We’re here to help! Wild Yards is a completely free website that is 100% dedicated to helping you create a wildlife-friendly, sustainable yard. Read more
WildYards is reader-supported. When you buy a product through a link on our site, we may earn a comission. Every product is independently selected by our (obsessive) editors and our reviews are unbiased and objective. Read more about our mission or our privacy policy.
Squash is one of the easiest garden vegetables to grow. But if you start your squash seeds indoors, you have to transplant them at exactly the right time to give them the best chance of survival. Too early and the seedlings won’t be able to handle the harsh environment. Too late and they’ll be stunted as their roots struggle to recover from transplant shock. So how can you tell when to transplant squash seedlings to your vegetable garden?
You should wait 2 weeks after the last frost before moving squash seedlings outdoors when temperatures are 65 degrees and above. Once your new squash plants develop their first set of true leaves, it’s safe to transplant them to their permanent home in your garden.
How to start squash seedlings in pots indoors
It’s best to start your squash seeds directly in the soil in your garden. But, this isn’t always possible. Unexpected spring hail storms can beat young plants to a pulp, and late-season freezes can kill them altogether. Starting squash seeds inside may not be ideal, but sometimes it’s the best choice.
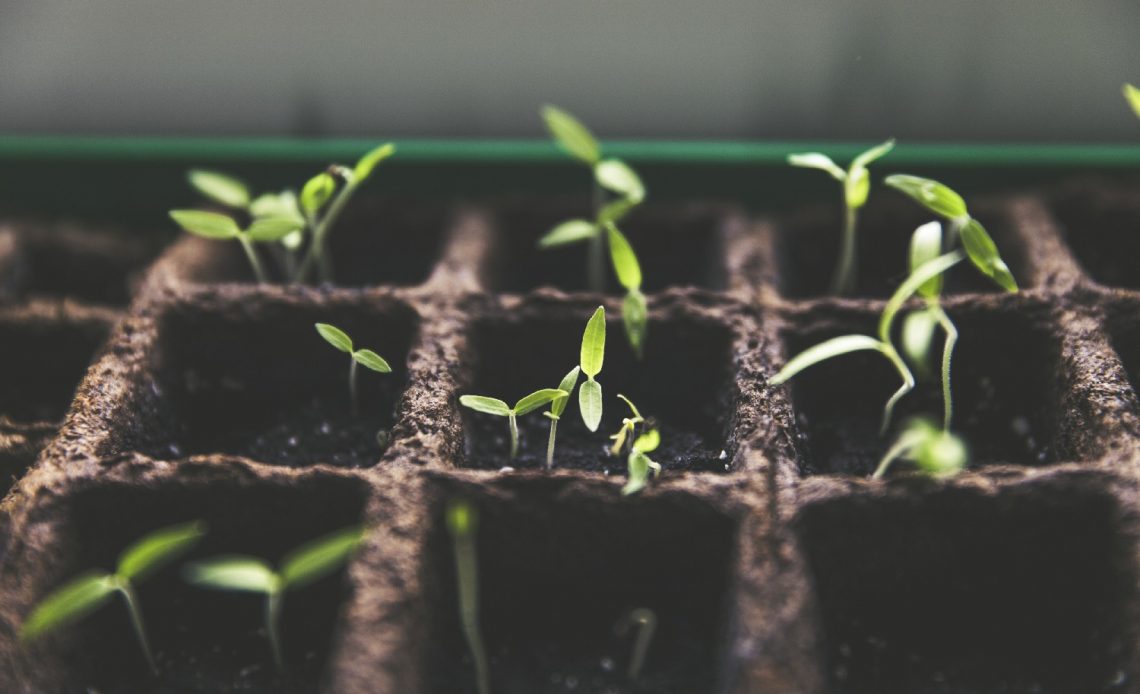
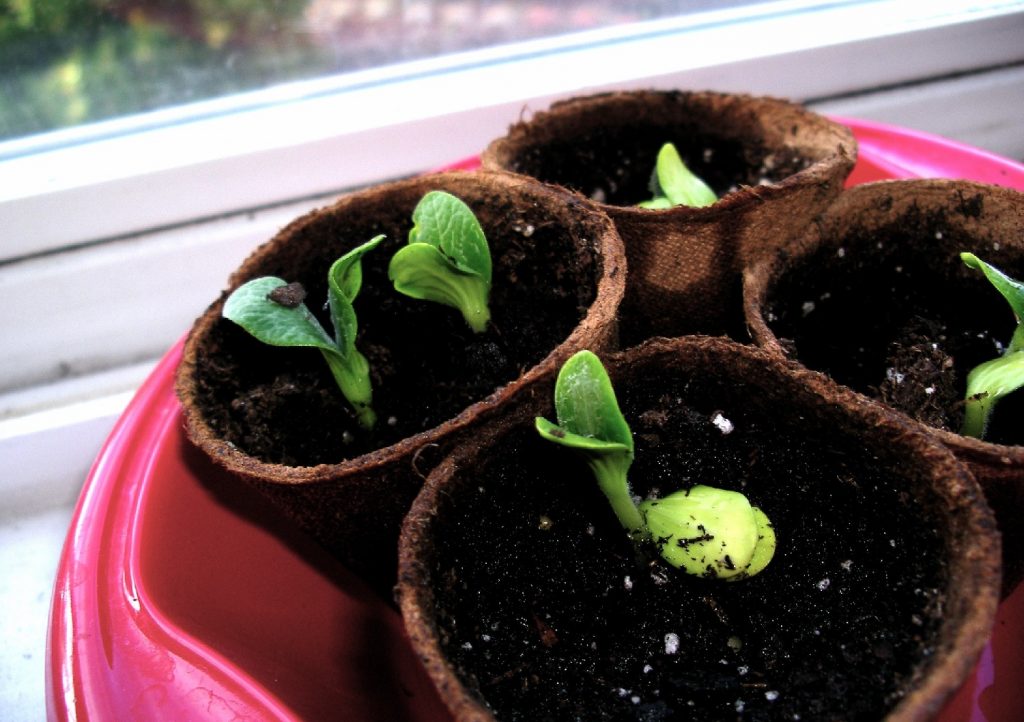
To start your squash seeds indoors, fill paper cups, seed trays, or peat seed pots with a 1:1 mixture of potting soil and soil from your garden. Starting the seeds in a mixture that includes the soil they’ll mature in makes it easier for the roots to adapt once you transplant them. Next, sow 1 or 2 squash seeds ½ inch deep in each pot. Cover them gently and water them well.
Set your squash seedlings on a sunny windowsill to keep them warm, and check the soil every day to make sure it’s moist, but not soggy. Squash seeds germinate quickly. You’ll likely see shoots in as little as 3 days, though it may take up to 10 for them to sprout.
When to transplant squash seedlings to your garden beds
Squash, zucchini, melons, and gourds are easy growers, but they can be sensitive to transplanting. So there are a few things you need to keep an eye out for before moving your squash plants to their permanent residence. First, you need the temperatures outside to warm up and stay warm. And, second, you need to make sure your seedlings are old enough to survive life in the great outdoors.
Wait 2 weeks after the last frost of the season before transplanting your squash seedlings. Squash plants like warm weather, so hold off on planting them until the mercury stabilizes. Ideally, temperatures should be at or above 65 degrees Fahrenheit. Any cooler than that, and your squash plants won’t grow well.
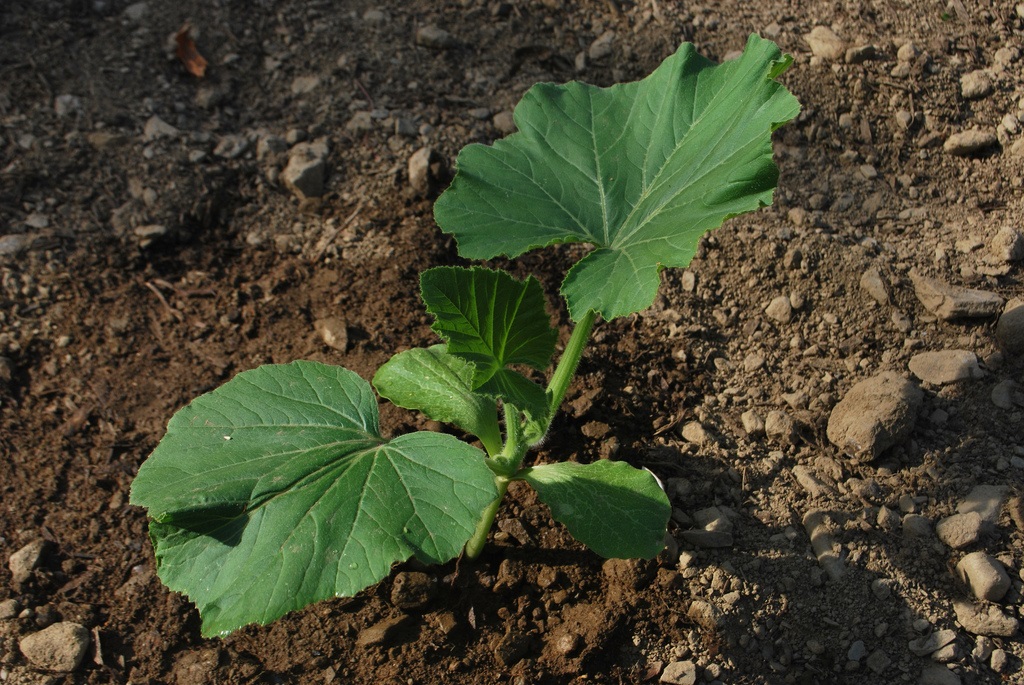
You’ll also need to wait until your squash seedlings have developed true leaves before transplanting them. Squash are dicots, meaning they produce two seed leaves once they germinate. These shiny, round, smooth-edged leaves help the young plants grow. But true leaves are needed to help the plants produce energy and survive the harsher outdoor environment.
A plant’s true leaves look like smaller versions of its adult leaves. So, in squash’s case, true leaves will have toothed edges and be broad and triangular in shape with rounded corners. Once your squash seedlings have a pair of true leaves, that’s a sign the plant is mature enough to handle living outside. Allowing the seedlings to continue growing in their seed pots at this point will cause them to become root bound. This drastically decreases their chances of survival once transplanted.
What are squash’s growing requirements?
Before you transplant your squash seedlings, take a minute to survey your garden. You want to make sure you place your squash seedlings in the right spot the first time around because, again, squash plants don’t like to be transplanted.
Squash plants grow best in full sun in well-drained soil. These veggies are tolerant of neutral and slightly alkaline soils, but they grow best in soils that are slightly acidic. Squash plants are light nutrient users with shallow root systems, so there’s no need to amend your soil before planting them. Just be sure the soil is loose so your seedlings’ roots can grow easily.
Squash plants don’t like soggy soil, but they benefit from moist soil, especially when young. Water your squash seedlings every other day for the first few weeks after planting them. As they grow, you can go longer in between waterings.
If you notice your squash plants beginning to wilt or dry out too quickly in between waterings, consider applying a layer of sawdust, wood chips, or lawn clippings to help them stay hydrated. Using organic matter as mulch can improve your squash crop yield.
What’s the safest way to transplant squash seedlings into your garden?
When transplanting squash seedlings, slow and steady wins the race. Take your time and be careful not to jostle the seedlings around too much. The key to transplanting squash seedlings successfully is to disturb the roots as little as possible.
Start by digging a hole twice as large as your seedlings. The holes should be 6 to 8 inches deep, giving you plenty of room to place loose soil under the seedlings so the roots have some wiggle room.
Next, prepare the seedlings. If you started your seedlings in paper cups, use a pocket knife to cut the cup away from the roots. If you used peat seed pots, all you have to do is trim the bottoms off so the roots can reach the soil. Using bare hands (gloves can make it too difficult to feel what’s going on), place the seedling in the hole, and backfill around it.
Make sure the root collar — the place where the roots turn into the stem — is level with the surrounding soil. Gently tamp the dirt around the seedlings to get rid of any air pockets, and water them well to help the soil settle. Be sure to uproot any weeds to prevent them from robbing your young squash plants of valuable nutrients.
How far apart should you space your squash seedlings?
Squash plants take up a lot of ground space, so it’s important to plant your seedlings far enough apart. Placing them too close together will cause them to compete for nutrients. To prevent your squash seedlings from smothering each other as they grow, place them 4 feet apart with 3 feet in between rows.
Vining squash varieties can be trained to grow up trellises. This saves a lot of ground space, which you can use to grow squash companion plants. Oregano, in particular, benefits your squash plants by repelling insects that like to feed on them, including beetles, caterpillars, and leafcutters.
Can you transplant squash mid-season?
Sometimes squash plants grow bigger than anticipated. If your squash plants have outgrown their growing space halfway through the season, you can try transplanting them. But because these plants are so sensitive to being moved, your results will be pretty hit-or-miss.
If you do attempt to transplant adult squash plants, dig a new hole larger and deeper than you think is necessary. The plants will have a better chance of surviving if the soil is loose. Also, take some soil from their original growing space and incorporate it into the new soil to reduce the chances of transplant shock.
Water your mature squash transplants regularly in the days following the move. You want to keep the soil moist to stimulate root development. But if the soil gets muddy, the roots may rot, so water judiciously.
Do squash plants grow better in raised beds or directly in the ground?
Whether you choose to plant your squash seedlings in raised garden beds or in an in-ground vegetable patch doesn’t really matter. As long as the plants can get enough sunlight and as long as the soil is loose enough for the roots to grow easily, your squash plants will do just fine. However, there are a few benefits to growing your squash seedlings in raised beds that make it worth your consideration.
For starters, it’s much easier to control the soil conditions of raised garden beds. You can add gravel to the bottom of your raised beds to improve drainage. You can easily incorporate compost, manure, worm castings, coffee grounds, and other natural fertilizers as needed since the soil is already broken up. It’s much easier to tend to your plants and accommodate their changing needs as they grow when they’re planted in raised beds.
Another major benefit to growing vegetables in raised beds is that they’re much easier to tend to. Weeding, pruning, and applying insecticides don’t feel like chores when you don’t have to get down on your hands and knees or break your back to do them. Even though this benefit has no bearing on your squash plants, it’s certainly a bonus for you.
Tips for success when transplanting your squash seedlings
To prepare your seedlings for their big move, keep them outside as often as possible. Set them on your patio or porch in the sun when the temperatures are high enough, and bring them in again when it starts to get cold. This will help them acclimatize to their permanent home.
Once your seedlings have been transplanted, be sure to stick to a regular watering schedule for the first few weeks. Young squash plants will die if they get stressed out, so make the transplanting process as easy for them as possible by keeping them hydrated.
Transplanting squash seedlings is a little trickier than transplanting cucumber seedlings, but that doesn’t mean it’s impossible. With patience and proactive care, you can move your squash plants to your garden safely.