
We’re here to help! Wild Yards is a completely free website that is 100% dedicated to helping you create a wildlife-friendly, sustainable yard. Read more
WildYards is reader-supported. When you buy a product through a link on our site, we may earn a comission. Every product is independently selected by our (obsessive) editors and our reviews are unbiased and objective. Read more about our mission or our privacy policy.
If you have any experience in planting flowers in your garden or maintaining a compost bin, you’ve likely come across various minibeasts. Many garden creatures are beneficial to your soil and the plants growing in it – but in some cases, white worms in soil could spell trouble.
White worms appearing in your soil or compost are likely to be grub worms, pot worms, the larvae of fungus gnats, or even parasitic nematodes. You’ll most likely want to remove and deter these invasive critters as quickly as possible. Let’s take a closer look at these persistent pests in detail.
Grub worms
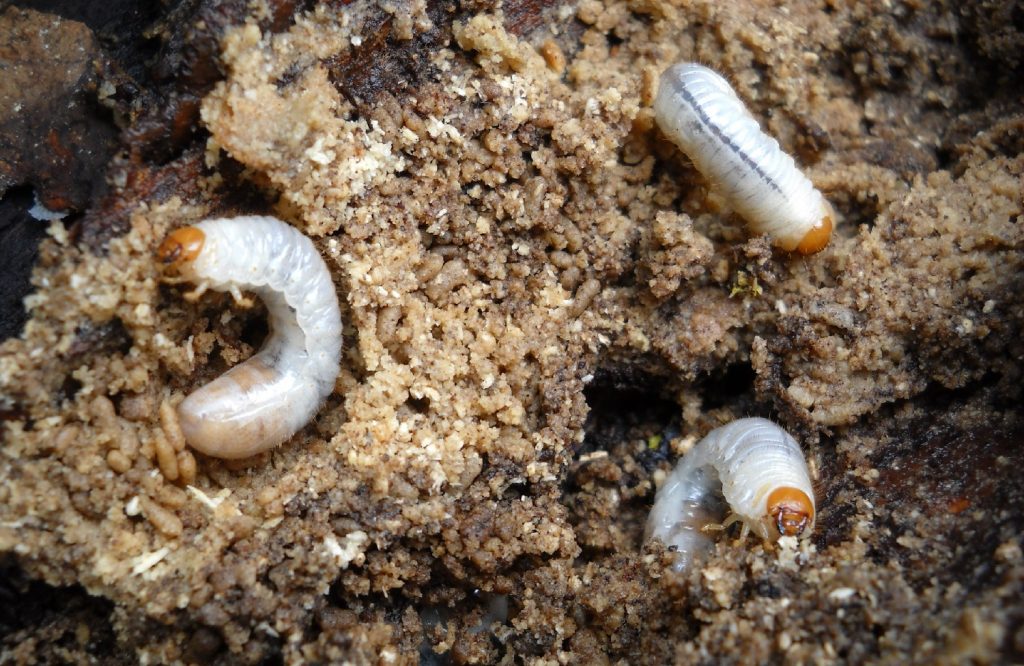
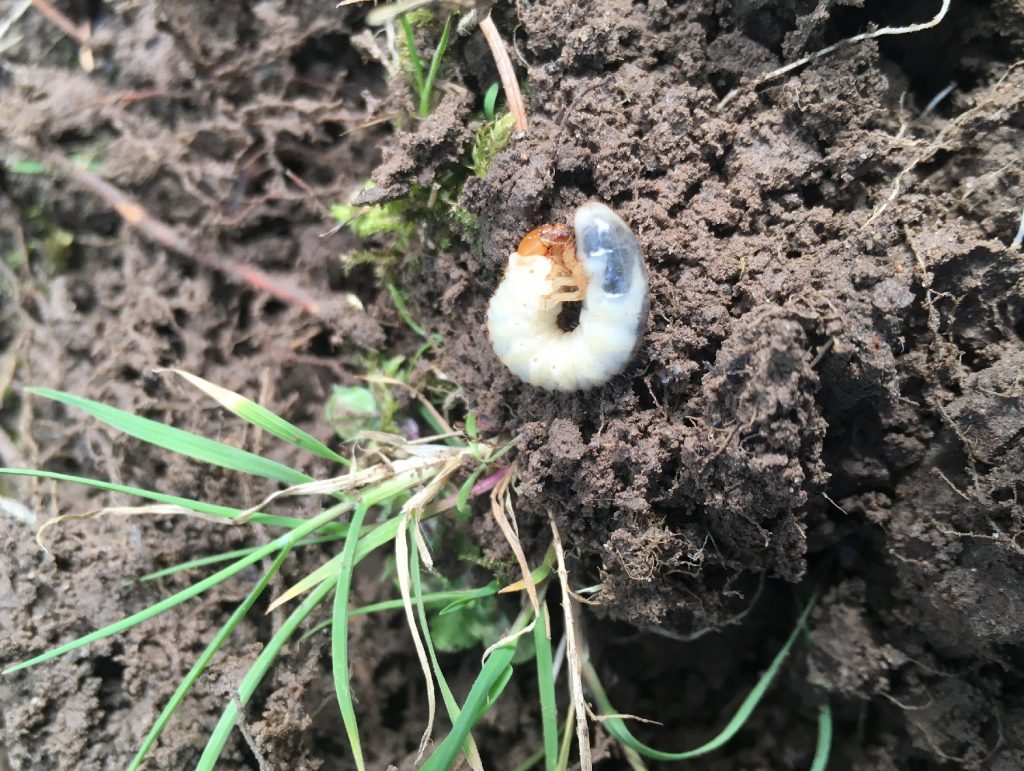
Grub worms are larvae that belong to various beetle families – such as scarabs and Japanese beetles. While it’s not always detrimental to have beetles in your garden, grub worms can seriously damage your plants.
These tiny, white worms are generally short and plump, measuring up to three inches in length. They’re typically laid by mother beetles a couple of inches into your growth medium and will hatch within a month. After this time, they’ll start feasting on any natural or organic matter that’s growing in their soil hatchery. This, regrettably, can go on for several weeks – and even one worm alone can do untold damage to plants.
Some grubs that grow into beetles can become even more destructive – meaning that the best course of action is to remove the school of worms at the source.
How to remove grub worms from your soil
Grub worms provide major headaches for gardeners, but it may be as simple as attracting amphibians and common birds to your garden to take care of the pests naturally. Many of these predators won’t need much encouragement, as the presence of insects alone should attract them to come and feast on your pesky pests.
In the worst-case scenario, consider completely replacing your soil. This means removing the topsoil and spraying pesticide before replacing it with fertilized compost or a similar medium. When choosing a pesticide, go organic or non-chemical – your plants and any helpful animals close by will thank you.
Pot worms
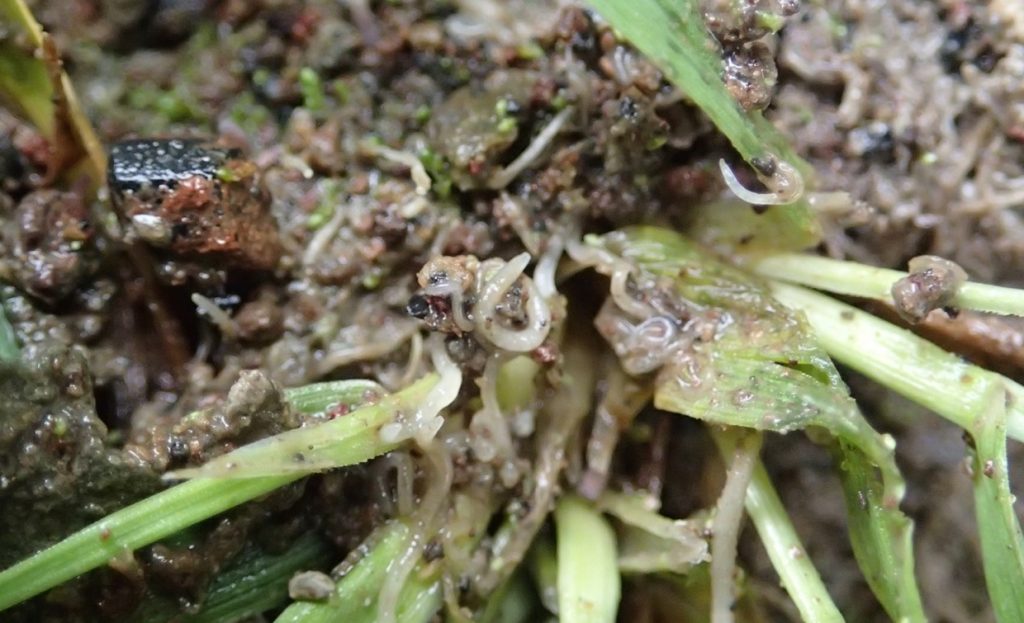
The good news is that white worms in your soil are more likely to be pot worms than grubs – mainly because they propagate so wildly and with little encouragement. Potworms are often confused with young red wiggler worms, which are highly beneficial to ensuring compost and soil stay rich and nutritious. Sadly, the good news ends here as pot worms can be destructive – though not as much as grub worms or fungus gnat larvae.
Pot worms will typically start emerging and breeding when your soil turns a little acidic – perfect for some plants but also preferred by these persistent pests. Leaving pot worms to reproduce is not a great idea if you continue welcoming more beneficial worms and insects to your soil, as they are highly competitive – and will outbreed most other species.
In some cases, pot worms can help improve the quality of your soil – as they can aerate your growth medium to ensure roots get better circulation.
How to remove pot worms from your soil
Ideally, you should only really remove pot worms from your soil if they start to increase in unmanageable numbers or if they are fighting back other worms from breeding. As with grub worms, you may wish to remove the topsoil and spray organic pesticide before replacing it with fresh compost. You can also use neem oil to prevent these worms from returning.
Adding mulch and organic matter to help make your soil more alkaline will also help deter pot worms from returning to your plot. Consider adding lime or limestone, wood ash, or bone meal, for example. Be careful to change your pH too much if plants are already growing in the medium – as they may be adversely affected by the change.
Fungus gnat larvae
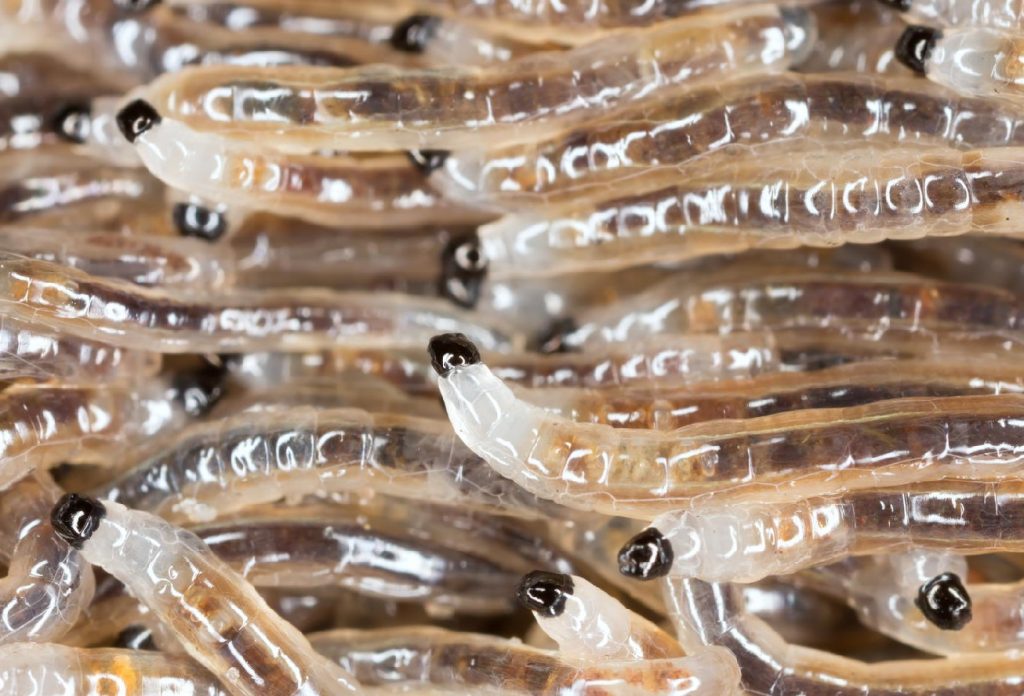
Fungus gnats are frequently spotted flying around houseplants – but they’ll breed inside and outside your home. Fungus gnat larvae look similar to grub and pot worms – and if left to persist, they will happily munch through your precious plants and flowers. Typically, an adult fungus gnat will lay eggs in highly moist soil, and after two to three days, the larvae will hatch.
Fungus gnat larvae will munch through plants and organic matter with abandon – and will even start to gnaw through plant roots if food is scarce. These pests can be just as harmful to plants in your garden as grub worms, if not more so. Ironically, adult fungus gnats are docile and pose no threat – unless they start breeding.
This larva is easy to tell apart from other worms if you look closely, as they tend to be fatter and have black markings. In any case, even spotting one gnat larva means it’s time to take action.
How to remove fungus gnat larvae from your soil
Getting rid of fungus gnat larvae may be as simple as curbing how much you water your plants. Fungus gnats won’t lay eggs in dry, slightly moist soil – it must be drenched. Ideally, the top three inches of your growth medium should dry out completely before you consider adding more water. It’s also worth placing your plants in a sunny area if in pots – so the soil will dry out much faster.
Again, neem oil is a great worm remover – using it mixed with the soil will quickly eradicate larvae populations. In some cases, it may be worth using hydrogen peroxide if overpopulation is a serious issue – but it’s advisable to stick to natural solutions for the sake of your plants.
Otherwise, keeping fungus gnats away from your plants is as simple as keeping the soil clean and clear.
Nematodes
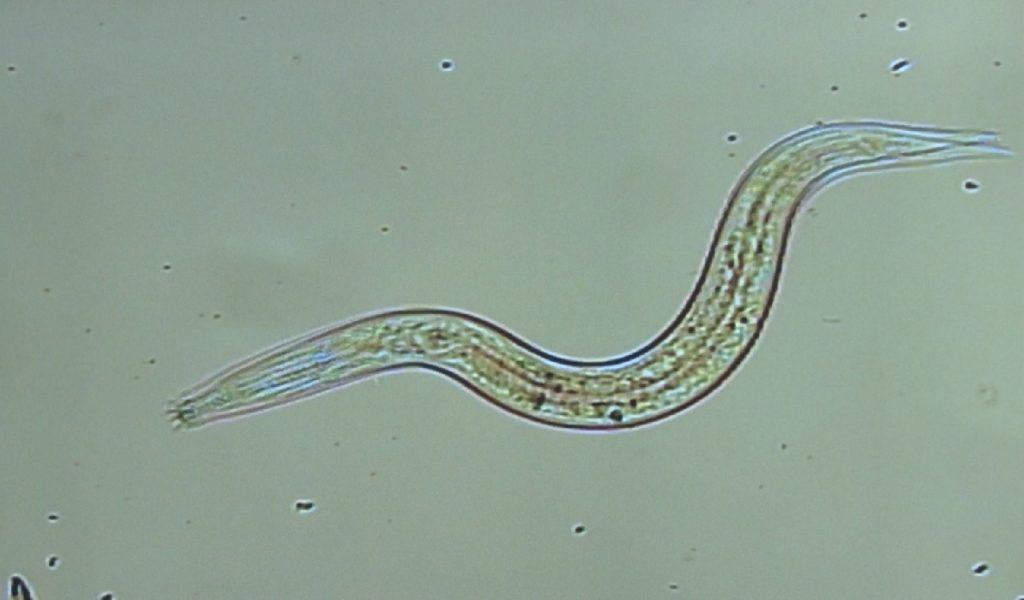
Parasitic nematodes are just as scary for your garden as they sound – these long, thin, white worms are much skinnier than the other creatures listed thus far. Nematodes will devastate entire plant populations if left to persist, meaning they will eat through the root systems of your flowers as a priority. They are some of the most destructive worms you’ll find in your soil.
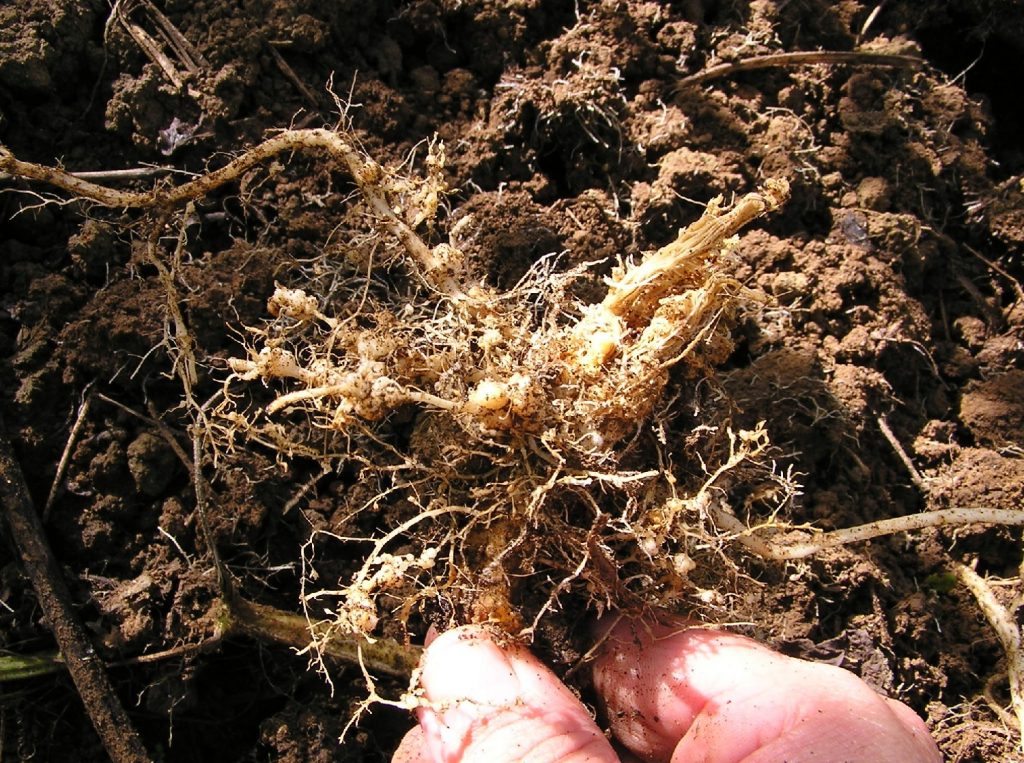
The biggest issue gardeners face with nematode attacks is that these beasts are not very easy to spot – they are almost microscopic. Instead of roaming for food and nutrients, many species will reside in one spot and choose to feed almost continuously on a root system they know they can rely on for sustenance. Because these pests can’t be seen with the naked eye, the only way to determine if you have a nematode infestation is by observing the roots of your plants.
Many gardeners might assume their plants are dying of malnutrition or dehydration if nematodes take hold of their root systems. They are commonly behind cases of plant populations dying despite gardeners carefully feeding and watering their specimens. In addition, nematodes are carriers of various fungi and bacteria, which can spread to other plants in the same bed, even if they’re not actively feeding at their roots.
Crucially, a nematode population is one you’ll need to remove efficiently or risk losing plants rapidly.
How to remove nematodes from your soil
Thankfully, removing nematodes may be as easy as subjecting your soil to intense heat or mulching it. Again, as with grub and pot worms, it may also be worth removing the topsoil and replacing it with a fresh covering of medium after using organic pesticide.
Intriguingly, there are some plants that you can grow which will either deter or kill nematodes altogether. Consider growing dahlias, for example, to prevent these pests from reappearing. It’s also a good idea to mulch plants such as the French marigold, rapeseed, and painted daisy as manure – replacing your topsoil with this mix will ensure to kill off any remaining nematode populations.
Why are white worms appearing in my soil?
White worms, regardless of species, generally start appearing in soil when it’s moist, at a particular pH, or if there’s lots of organic matter strewn about to eat.
It’s been raining
While our plants – and the soil they grow in – need rainfall to survive, precipitation that’s left to pool can wash away nutrients from the growth medium. Wet soil is the preferred playground of many parasitic and invasive worms, as their parents can easily plant and bury eggs deep down. The wetter the soil, the faster worm populations will grow, too. Humidity also plays a part here – moisture is desirable to fungus gnats in particular, which is why you’ll likely find them flying around your houseplants.
They’re attracted to your soil pH
Acidic soil attracts pot worms and various other invasive creatures – but unless you add an organic mulch to your medium, it’s unlikely you can do much about this situation. Certain plants and flowers thrive in acidic soil, while others enjoy more alkaline mediums. It’s best to simply monitor your soil pH with litmus strips and/or specific soil monitors and to focus more on keeping your ground from getting too wet.
You haven’t cleared your soil
Even if your soil isn’t particularly wet, earth that’s covered in dead plant detritus, leaves, and decaying matter will always welcome worms and invasive pests. To these creatures, it’s a free meal – and if you don’t clear up your soil, they will come to rely on your soil for fast food. At the start of fall, regularly clear your flower beds and potted soil of leaves and other fallen debris to stave off worm populations. If you’re in the process of dethatching your lawn, it’s worth clearing up your soil beds, too.
Checking inherited or bought plants
It’s worth remembering to check any plants you inherit in pots or containers, or those you may buy from garden centers or online, for signs of small, white worms. Transferring these plants without inspection into your soil may allow populations to grow and damage any existing specimens you’re already growing.
Additionally, a plant that’s already infected with small, white worms is unlikely to fare too well without treatment. If you’re willing to give an affected plant a good home, be ready to perform a little surgery – i.e., completely remove the current growing medium and apply a little neem oil – before introducing it to a communal bed.
Do I have to remove all of my soil to get rid of white worms?
In most cases, simply removing the top layer of soil and replacing it with fresh compost will be enough to remove most white worm populations. In extreme cases of nematode destruction, it may be worth completely removing the existing soil to avoid spreading bacteria and fungi to plants growing in the same medium.
What is neem oil, and is it really effective at removing white worms from soil?
Many gardeners prefer neem oil as a green alternative to chemical pesticides. It’s naturally derived from neem tree seeds and tends to smell fairly pungent. As a pest deterrent and killer, it’s been relied upon for decades. Frequently, neem oil is used in agriculture to help spray and powder crops likely to fall prey to destructive insects and worms.
As a natural pesticide, neem oil is a preferred choice for removing white worms and invasive beetles without the risk of killing plants. You often only need a small dose of neem oil, mixed with soap and around a liter of water, to effectively kill and deter worms from your soil.
The great news is that treatment through neem oil and careful topsoil removal should take effect relatively swiftly. Be sure to monitor your plants and soil and to remove any worms you spot by hand if you can.
Are white worms killing my plants?
Not all small, white worms spell danger for your plants (the least problematic are pot worms), but if your soil is infested with nematodes, grub worms, or fungus gnat larvae, you’ll need to make sure to treat your plot appropriately.
Whether you’re composting in a bucket or are growing flowers to attract hummingbirds and other pollinators to your garden, there are quick and easy ways to get common pests out of your soil before they cause too much damage. Don’t lose hope just yet!
