We’re here to help! Wild Yards is a completely free website that is 100% dedicated to helping you create a wildlife-friendly, sustainable yard. Read more
WildYards is reader-supported. When you buy a product through a link on our site, we may earn a comission. Every product is independently selected by our (obsessive) editors and our reviews are unbiased and objective. Read more about our mission or our privacy policy.
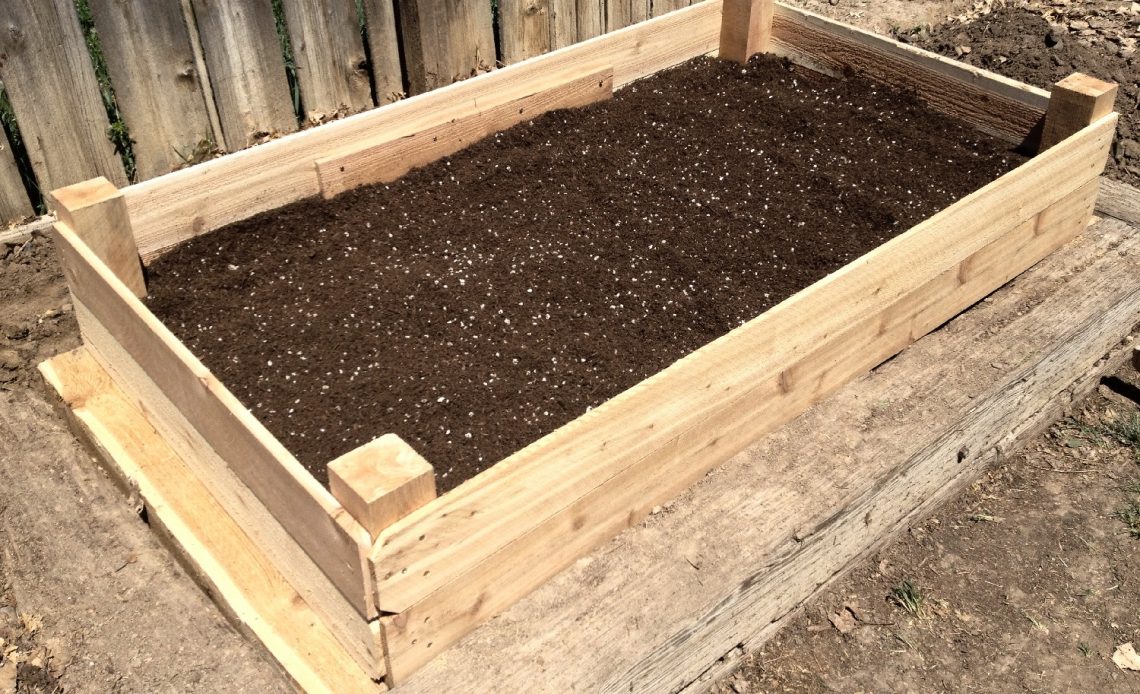
If you’ve set up a raised garden bed for the first time and are raring to go, you’ll need to fill it with rich soil for the healthiest plants. Sadly, filling up is quite expensive – but have you considered raised garden bed soil layers to help cut costs?
Layering soil and organic material in a raised garden bed can help save you money while helping to preserve the best-quality medium towards the top. Using a method called ‘hugelkultur’, you can layer your raised bed with branches, plant waste, and compost – keeping your soil stable and nutritious and roots well-fed!
What exactly is soil layering in a raised bed?
Layering soil and organic matter in your raised garden bed means using material from your yard that will naturally decompose over time. Instead of filling your entire bed with expensive soil, you can use the hugelkultur method to layer green waste and scraps – which can also help with drainage and keeping your plants well-fed. It’s sometimes referred to as the ‘lasagna method’, or ‘hill culture’.
Instead of purely using rich topsoil, layering will typically require adding grass clippings, sticks, logs, compost mix, and organic matter you may otherwise find around your yard. Layered correctly, you can ensure that your plant roots slowly reach further into your bed as each level decomposes.
What are the benefits of layering a raised garden bed?
While there are many ways to efficiently layer a raised bed, they all carry the same benefits for you and your plants. Here are some ‘pros’.
It’s great for the environment
Believe it or not, burning off wooden material – while efficient to some extent – causes some harm to the environment. Instead of releasing CO2 when you burn old logs, twigs, and branches, you can leave them to safely degrade into your garden bed. Additionally, this process can help to reverse some of the damage done by CO2 pollution (known as carbon sequestration).
You should also focus on composting at home rather than buying bulk bags, too – if you want to focus on reducing your carbon footprint.
It’s great for your soil
Letting organic matter degrade in your soil will encourage visitation from helpful earthworms and insects and encourage natural moisture and aeration. This allows plant roots to soak up a greater variety of nutrients than they may generally achieve in standard beds. As such, you can expect stronger, more resilient, and longer-lasting plants.
Additionally, the bacteria in compost can help raise the temperature of your soil bed – offering support to less hardy plants and vegetables in colder zones.
It’s extremely cost-effective
While filling a raised garden bed with soil you’ve bought from a garden center is tempting, this process is painstaking and very expensive. By only using a fraction of high-quality soil, you can bulk out most of your bed’s volume with organic matter otherwise fallen and/or degrading in your yard. That means you can save what’s left in any soil bags you’ve bought for other projects.
It’s a great use of garden waste
If you’re struggling to repurpose fallen leaves, grass, or hedge clippings, you can put them to fantastic use in a layered garden bed. This saves you from sending piles of organic waste to local landfills or recycling centers – keep your detritus for yourself and let your own plants and vegetables benefit instead.
You won’t need to tend to it (much)
Setting up a garden bed with layers is going to take time and effort immediately, but once set up correctly, you only really need to top up on feed and/or compost ad hoc. This is on a need-be basis, meaning topping up should only be necessary if you see your crops are starting to wilt or fade.
It’ll help you control water
Drainage is contentious with growing many plants to full health, and a layered bed can help you balance too much moisture and too little hydration. Effectively, your garden waste – as it is layered – will help to keep water locked in and release back into your soil during drier months. What’s more, there’s little need for you to constantly water your plants, as plenty of moisture should be locked in – providing you have an effective bottom lining or layer, you can expect a layered bed to drain clearly.
Things to consider before setting up a layered garden bed
If you’re raring to go, take a step back – there are many benefits, but you need to set expectations before you start.
Will you use a bottom lining for your raised bed?
Using a bottom lining for a raised garden bed is normally recommended if it’s raised above ground level and is reasonably deep (say, 17” or taller). Adding an appropriate liner to the bottom of your bed will help prevent weeds from growing up into your root systems, can help to reduce soil wastage, and protect your crops against invasive pests such as moles, gophers, and groundhogs.
Consider using an organic lining for the very bottom of your bed (such as leaves or even newspaper) for extra degradation or a more robust option (such as hardware cloth or woodchip) to help prevent weeds from getting into your bed.
Prepare for pests
While a reliable bottom lining can protect your plants from mammal attacks, you’ll always need to be vigilant for insect invaders – such as aphids and termites. Slugs, mites, and snails will also work their way into raised beds, meaning it’s worth looking for protective plants and herbs that can deter such minibeasts.
Consider planting chamomile as a companion if you want to stave off various plant diseases and grow rosemary to safeguard weaker crops from invasive insects. Alliums such as garlic and onion will also help confuse hungry pests that are likely to munch away at your prized crops.
Do also check any wood you use in your layers – as it’s here where you may find termites breeding and causing expedited degradation.
What will I need to start filling my layered bed?
Firstly, ensure you have tools of the trade – a good pair of gardening gloves, a reliable shovel and/or spade, and a wheelbarrow to carry your organic matter around in.
Then, gather up organic waste and any material that will naturally degrade over time. Here’s a suggested list to help you get started:
- Grass clippings and trimmings
- Hedge trimmings
- Vegetable waste
- Coffee grounds
- Cardboard
- Fallen leaves
- Animal waste/manure
- Hay and straw
- Sawdust
- Rocks and stones
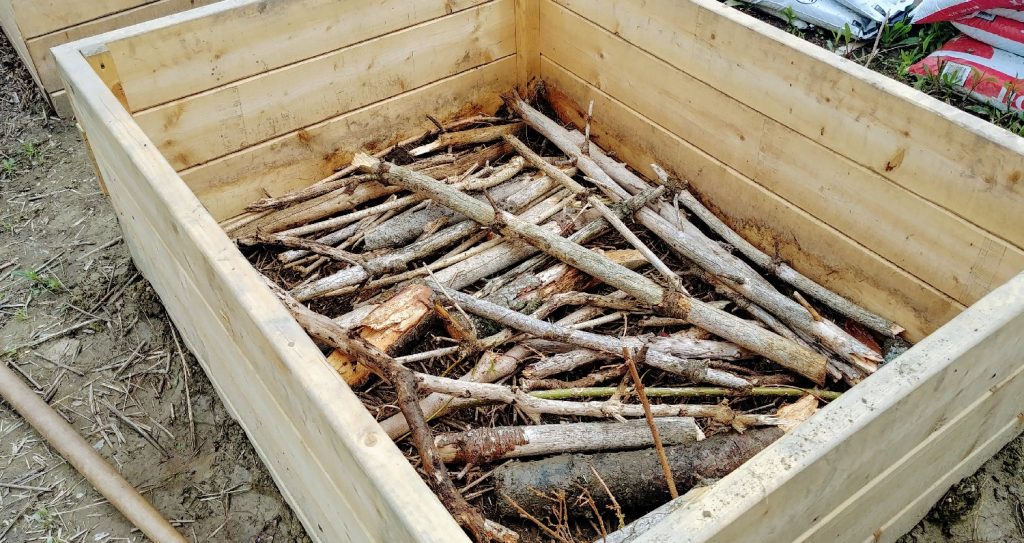
- Twigs, branches, sticks, stumps, and logs
- High-quality soil
- Standard potting soil
- Old newspaper
- Tealeaves
- Compost mix
Keep in mind that before you start, you’ll also need to measure how much soil and compost to fill your upper layers with. Calculate the volume of your raised bed in cubic feet and account for around 15% of your total depth to be soil. Some hugelkultur and lasagna gardening methods vary, but the general rule is compost, and soil are the thinnest layers rising to the top of the pile.
With this in mind, you’ll also need to keep any larger, heavier items to one side so you can layer them at the bottom of your bed. Otherwise, they will push down and crush anything you have lying underneath!
Layering your raised bed
Before layering your raised bed, remember that there are many different ways to effectively ‘lasagna garden’ – and the following methods are simply what the Wild Yards team finds most beneficial to plants and crops!
Regardless of how many layers you work with, consider your bottom lining first – are you going to use an organic layer such as wood or an artificial lining such as hardware cloth? Either option holds benefits – with the former being particularly helpful to keep out weeds and ensure healthy soil. If you like, you can line the bottom with newspaper and wood simultaneously.
You should also remember to never add anything to a garden base that contains trace chemicals or petroleum. Your lasagna should be 100% organic, meaning it also pays to check the wood you use carefully – don’t be tempted to use polished or finished furniture that you’re thinking of throwing away. Choose old logs and fallen branches in your yard, or if you want to purchase supplies, shop with a reputable dealer in unfinished, organic shavings and logs.
The simple method
The simplest way to layer a raised garden bed is to consider the three-layer model. That’s wood and/or newspaper on the bottom, potting soil and/or compost in the middle, and your high-quality soil towards the top. Remember, you only need a thin layer in high-quality soil for the lasagna method – up to 12” is normally adequate.
This method doesn’t make use of kitchen or garden waste beyond your compost mix (and the wood layer) – so be sure to make your own compost with organic refuse before adding it to the bed. This is more cost-effective than buying compost in bulk, too.
The ‘full lasagna’
If you’re confident you’d like to tackle five or six layers instead of three, ensure you have a large stock of organic resources listed above. For this method, you’ll need to get a little more mathematical, so you may need to grab a ruler or measure to add layers accurately.
Start by gathering heavier logs, branches, and other wooden detritus – this will need to make up around 40% of your base level. Again, if you’d like to use an alternative bottom lining such as newspaper here, too, you can.
The next layer up will need to be smaller pieces of wood, such as broken twigs and smaller branches. At this stage, you may also wish to include small stones, pebbles, and rocks to help with drainage. While rocks aren’t always recommended if you want to prevent weed growth, your wooden layer should already be taking care of this for you. This layer should account for around 20% of your total bed volume.
The next 25% of your garden bed will consist of soft waste. This should be your grass clippings, kitchen waste, vegetable waste, leaves, and anything you’ve not yet composted. This soft layer is a ‘gap filler’ between the slower-decomposing wood towards the bottom of the pile, though this waste will add lots of helpful nutrients to your soil.
The remaining 15% will be compost and topsoil. 10% of this should be compost, ideally made from your own bin or bucket (to save money, labor, and CO2). That final 5% is purely reserved for the richest soil – meaning you can make any supplies you’ve bought in bulk go further elsewhere in your garden.
Keeping things moist
While not all plants thrive in moisture, the effectiveness of the best-layered beds relies on locking in water – which means you’ll need to fill in all the gaps and pockets you can with soil and waste to avoid dry spots. If you’ve already bought a high-quality soil mix, this should be formulated and tilled to allow for healthy water retention and/or drainage wherever appropriate.
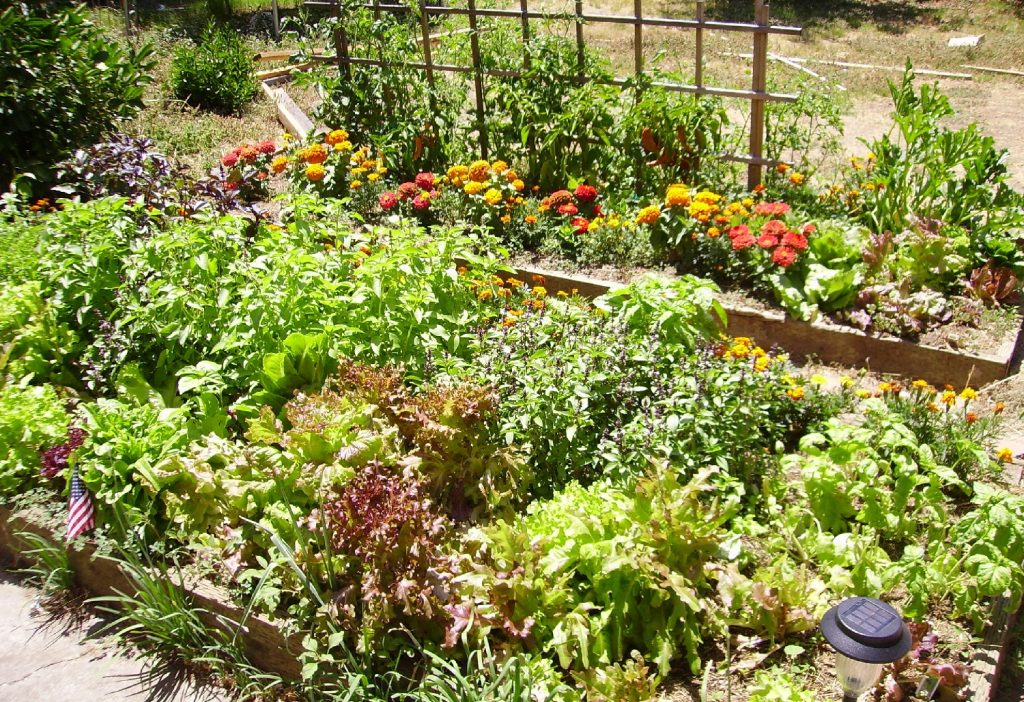
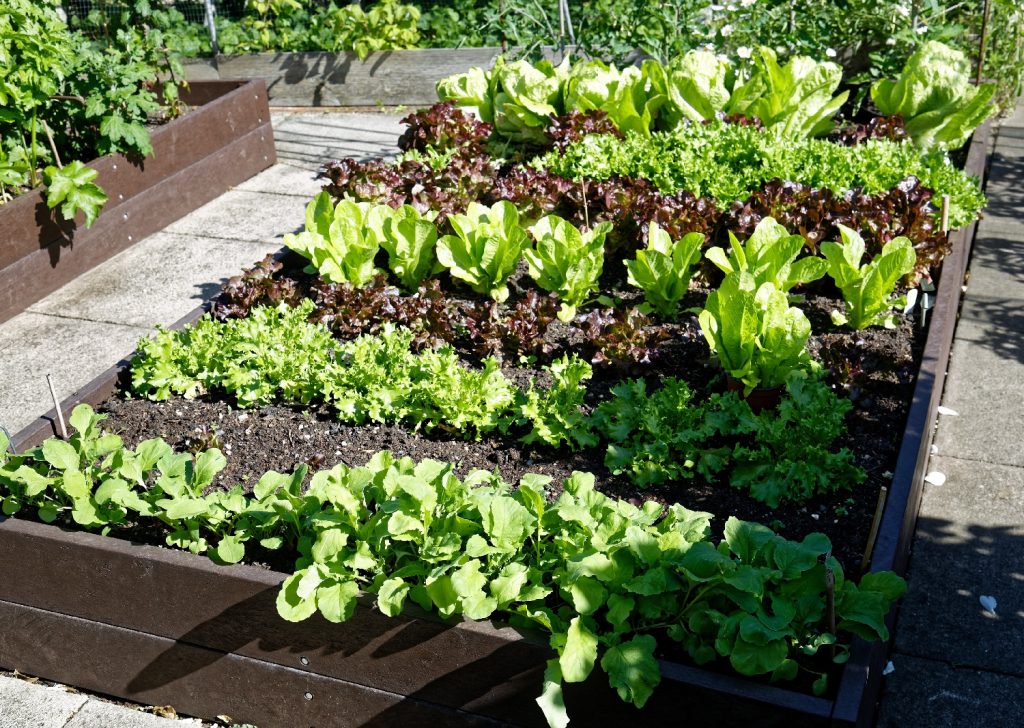
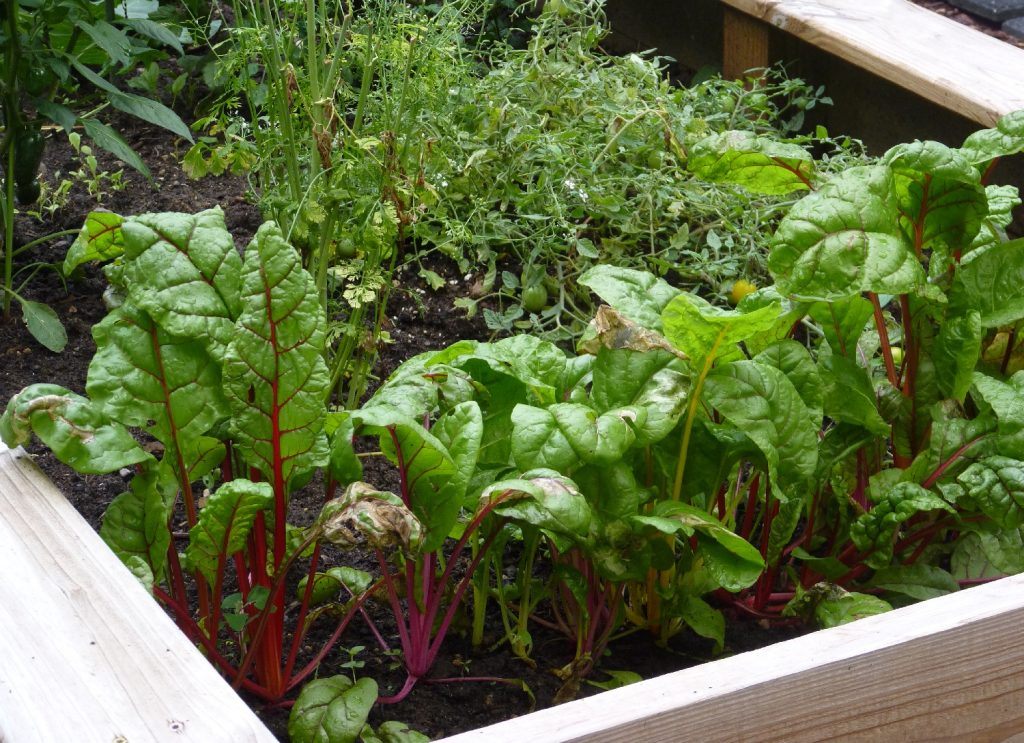
What can I grow in a raised, layered bed?
You can grow a wide variety of plants and vegetables in layered beds, though remember to set your bed up either in full sun or partial shade to fit the needs of the plants you grow.
Be careful growing vegetables and crops that are likely to over-compete for root space – particularly as you’ll be developing a deep soil structure! In this regard, go easy on growing some nightshades (such as potatoes) and some alliums (such as onions). Some herbs, such as dill, make good companions – but can overgrow sensitive specimens. The aim here is to create a delicate harmony!
Layering your garden beds is not only cost-effective – it’s also immensely beneficial to your plants and crops. It’s a great way to ensure your plants get the variety of nutrients they demand while never getting too wet or too dry. While there’s some assembly required, you’ll likely find maintaining a lasagna garden a lot of fun. You’ll soon grow bright, healthy yields – whether to look at and enjoy in the garden, or to harvest for use in the kitchen.