We’re here to help! Wild Yards is a completely free website that is 100% dedicated to helping you create a wildlife-friendly, sustainable yard. Read more
WildYards is reader-supported. When you buy a product through a link on our site, we may earn a comission. Every product is independently selected by our (obsessive) editors and our reviews are unbiased and objective. Read more about our mission or our privacy policy.
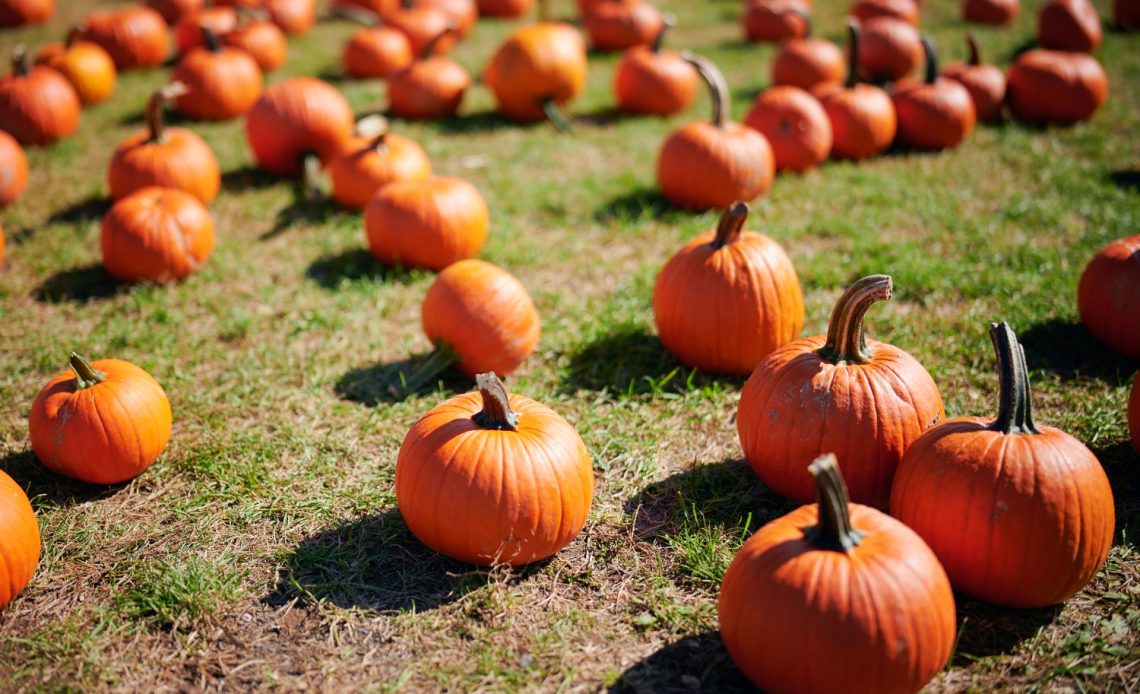
Great for decorating and for eating, too, pumpkins are a staple in many fall gardens. These large gourds are easy to start from seeds, and it can be incredibly rewarding watching them throughout their growth cycle. Pumpkin plants are hardy from zones 3 through 9. They grow best in full sun and in loamy, well-draining soils that retain just a touch of moisture. If you’re going to be planting pumpkins in your garden for the first time, understanding the 7 pumpkin growing stages will help you know what to expect.
Pumpkins are started from seeds, with seedlings sprouting within a week. Plants begin growing adult leaves in the following weeks. As the plants mature, they produce flowers which, once pollinated, make pumpkins. Young pumpkins are the size of a grape, but continue growing for anywhere from 80 to 100 days before they’re large enough to be harvested.
Stage 1: pumpkin seeds and seedlings
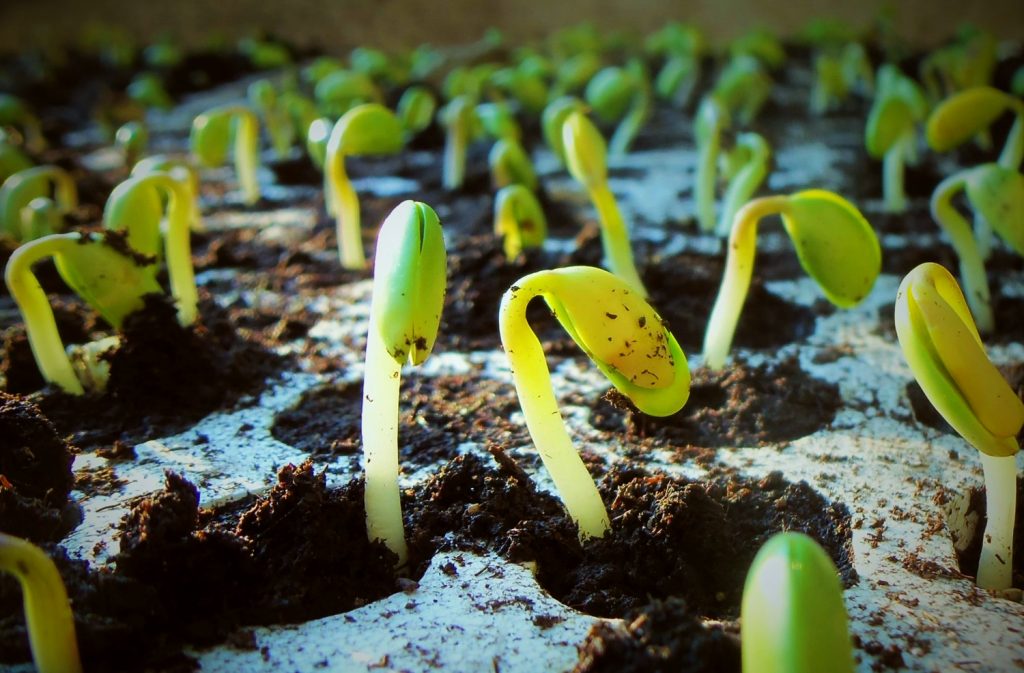
Pumpkins grow to be giant gourds, but they start out from tiny white seeds that measure about a half inch in length. Like cucumbers and tomatoes, pumpkins are easy to grow from seeds. You can start your pumpkin seedlings in peat seed pods filled with all-purpose potting soil, or you can wait until the last frost of the spring season before starting the seeds directly in your garden.
Pumpkin seeds should be sown at a depth of an inch. It’s important to keep their soil uniformly moist during the germination process. Seeds require plenty of water to begin sprouting but avoid overwatering them. If the seeds sit in muddy soil, they may drown.
Seeds should be kept on a warm, sunny windowsill. Pumpkin seeds will not survive if they get too cold, so to improve your chances of success at this pumpkin growing stage, be sure to keep the seeds warm. Within 7 to 10 days, your seeds will sprout, transforming into seedlings with two smooth, bright green seed leaves.
Stage 2: growing true leaves
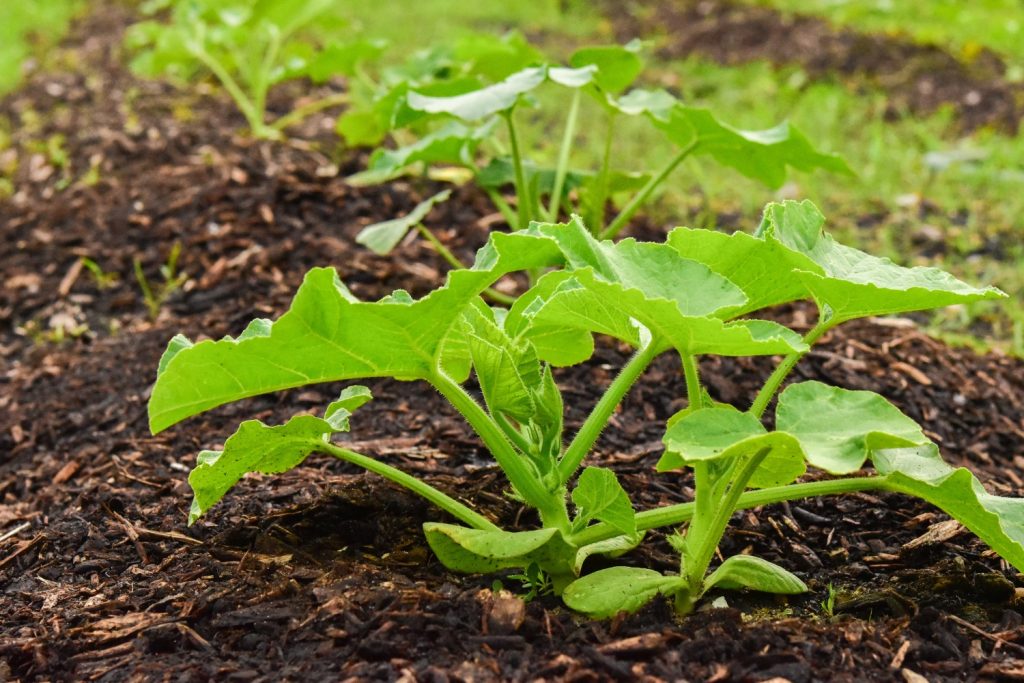
Once they sprout, your pumpkin seedlings will mature rapidly. Within a few days, the seedlings will be noticeably taller. Their spindly appearance may make them look awkward, but it’s nothing to worry about. The plants are just making room for their foliage. Soon, your seedlings will develop several sets of dark green true leaves, which sprout up and out from the center of the plant, in between the seed leaves.
True leaves differ from seed leaves in several respects. While the first set of shiny ovoid seed leaves help your baby plants survive, it’s the adult leaves that sustain the plants and allow them to meet all of their energy requirements as they mature. True leaves are also a sign that your potted seedlings are ready to be moved to your garden.
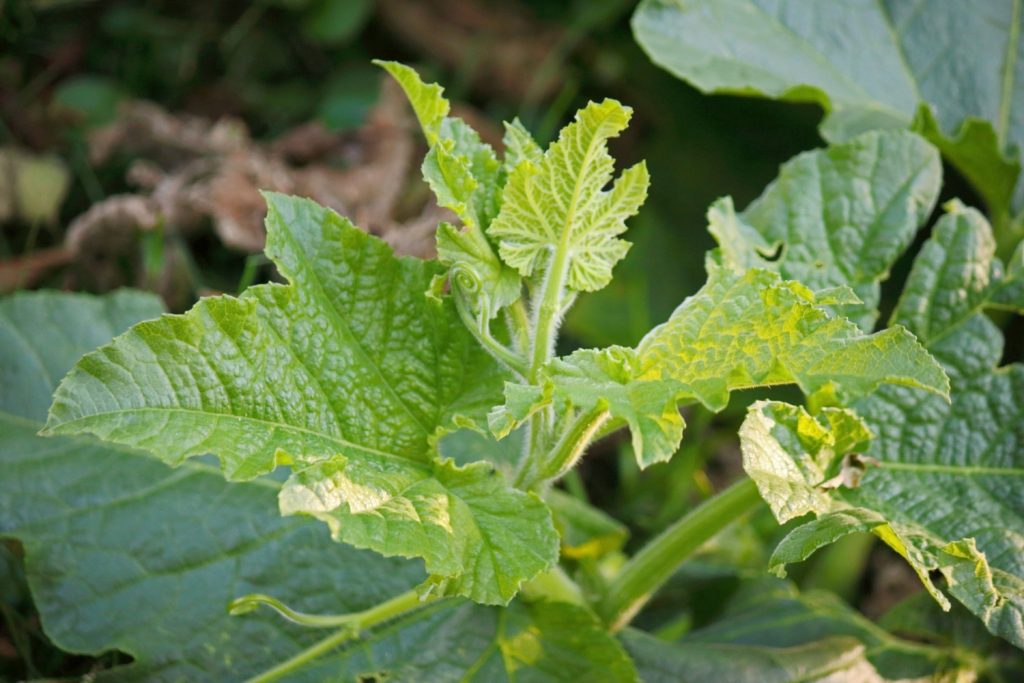
Although the shape of your pumpkin plants’ adult leaves depends on their variety, most adult pumpkin leaves are broad and lobed with finely toothed edges, much like other gourds. Adult leaves have a rougher texture compared to baby leaves and are more capable of withstanding the harsher growing conditions out in your garden.
Stage 3: making vines
Once your young pumpkin plants have become established, they’ll shift their focus from producing leaves to creating vines. Like other members of the Curcubita genus, including squash and cucumbers, pumpkins produce their fruits on long, winding vines, which typically spread anywhere from 6 to 15 feet.
Pumpkins rely on their vines to produce flowers and fruits, but the vines also help anchor the plant so it doesn’t blow away. The vine’s tendrils latch onto the ground to help the pumpkin stay put. The vine’s tendrils also act like roots, collecting water and nutrients from the soil to nourish the plant.
Pumpkin vines can grow at an impressive rate of 6 inches a day. The vines grow outward, away from the center of the plant. And because the fruits they eventually produce can weigh upwards of 20 pounds, large pumpkin varieties can’t be grown on a trellis. Giving your pumpkins plenty of space will help them produce larger gourds.
Stage 4: budding out
One of the more exciting pumpkin growing stages is when your plants begin to bud out. Pumpkin plants produce bright yellow flowers that are rich in pollen and nectar, making them irresistible to many pollinating insects. Even hummingbirds are attracted to the flowers. And it’s a good thing, too, because if your pumpkins’ flowers aren’t pollinated, the plants won’t make any pumpkins!
Pumpkin plants produce both male flowers and female flowers. Male flowers appear first, situated on thin stems with a stamen in the center of each blossom that is covered in pollen. Although male flowers do not produce fruit, they are critical to successful pollination, so pumpkin plants create male flowers in abundance.
Anywhere from 10 to 14 days after male flowers appear, female flowers start to open. These flowers are easy to identify because they have a small swollen fruit bud just beneath the blossom. If the flower is pollinated successfully, that little pumpkin will grow into a mature gourd.
Unlike other vines, such as blackberries, pumpkins are not self-pollinating. They rely on insects and animals to help them reproduce. Planting flowering companion plants like nasturtiums near your pumpkin patch can help attract the attention of beneficial pollinators. However, you can also pollinate your pumpkin plants by hand using a small paintbrush.
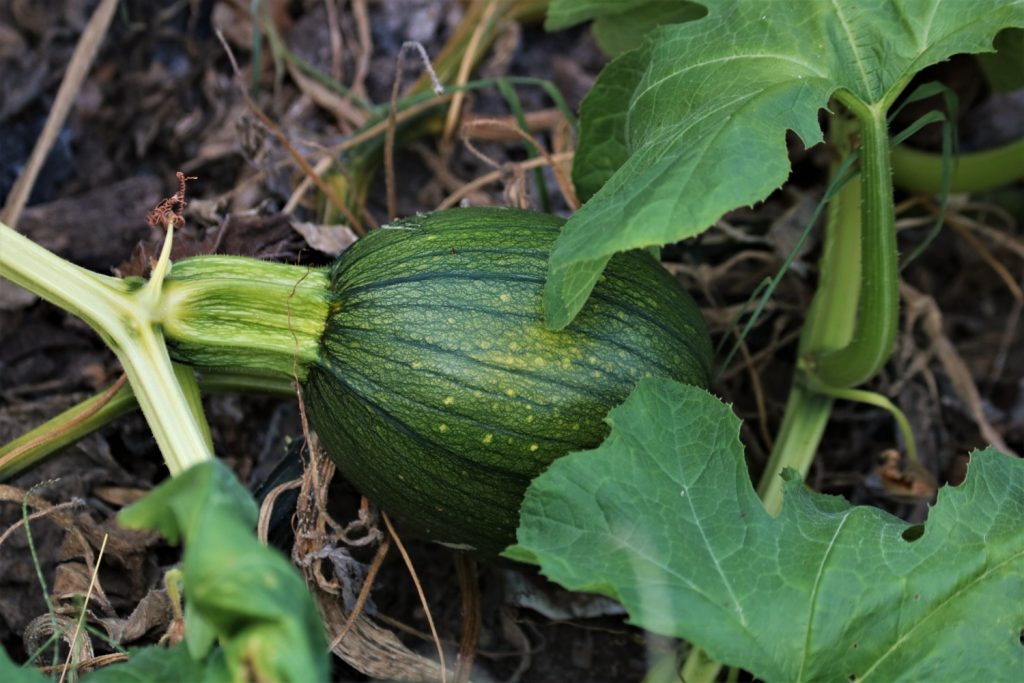
Stage 5: pumpkin formation
When your pumpkin plant’s female flowers have been pollinated successfully, their fruits will begin to grow. This is perhaps the most gratifying of the pumpkin growing stages because it shows you that all of your hard work is paying off!
Baby pumpkins start out a bright green, similar in color to the pumpkin plant’s foliage. As the little gourd grows, the shade deepens. At times, the pumpkin may resemble a watermelon, because it will develop pale green to yellow striations along its ribbing. Once the gourd begins to shape up, however, it will become wider than it is long, and start looking more like a proper pumpkin.
During this pumpkin growing stage, your pumpkin crops’ nutritional demands increase. The plants need more vitamins and minerals and more moisture to develop their fruits. Check the soil regularly and water your pumpkins well to prevent them from drying out. You shouldn’t allow the plants to sit in puddles, but make sure the soil is damp to the touch. Spreading a healthy dose of compost will help retain moisture and give the plants a boost of nutrients.
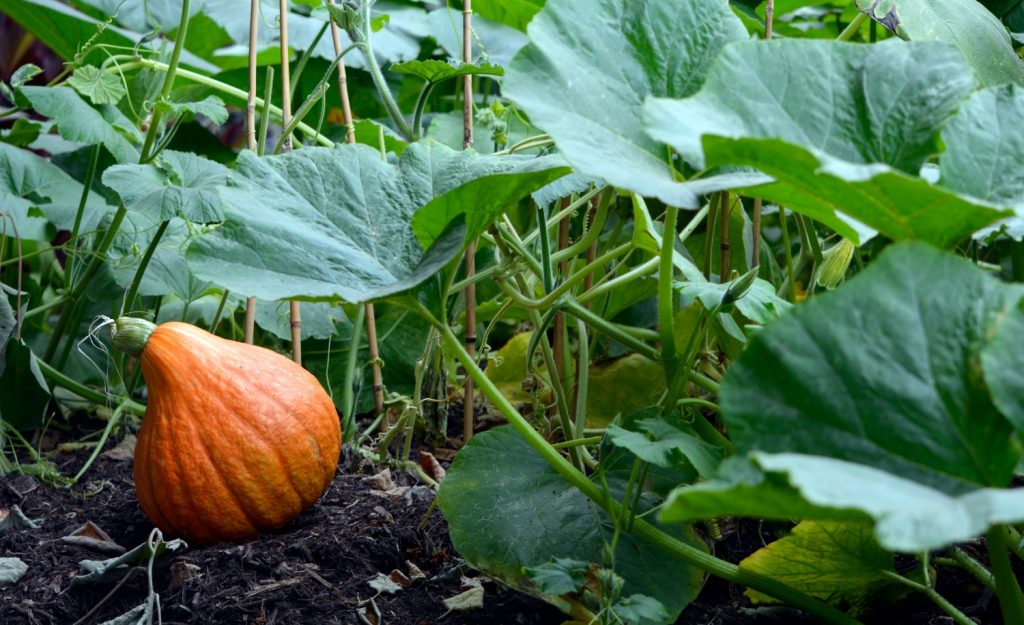
Stage 6: growing and maturing
Pumpkins are large vegetables, obviously. And while that makes watching them grow exciting, it can also make your patience run thin. Young pumpkins experience rapid growth initially, but their growth rate declines as they ripen. It can be frustrating, but this is completely normal. Pumpkins can take anywhere from 80 to 100 days to mature, depending on their variety.
Your pumpkins will ripen much faster if the temperatures outside stay between 50 and 90 degrees Fahrenheit. Pumpkins dislike sudden drops in temperature, so if it dips into the 40s overnight, your plants may have a hard time recovering. Extremely hot temperatures in the upper 90s and 100s will have detrimental effects as well. Since pumpkins love humidity, even dry air can inhibit pumpkin development.
Brown shriveled-up pumpkins are a sign that your plants are getting way too hot. But, on the other hand, if your pumpkins are retaining their moisture but they aren’t growing much, that indicates the weather is too cool for their liking.
If your pumpkins are having trouble staying warm, we recommend arranging wooden stakes about 4 feet in length around the pumpkins and draping clear plastic over them to create a tent. This will help trap heat and humidity, creating a more favorable growing environment for your pumpkins. Be sure to poke some holes into the plastic for air circulation. If the environment is kept too moist, the pumpkins may rot.
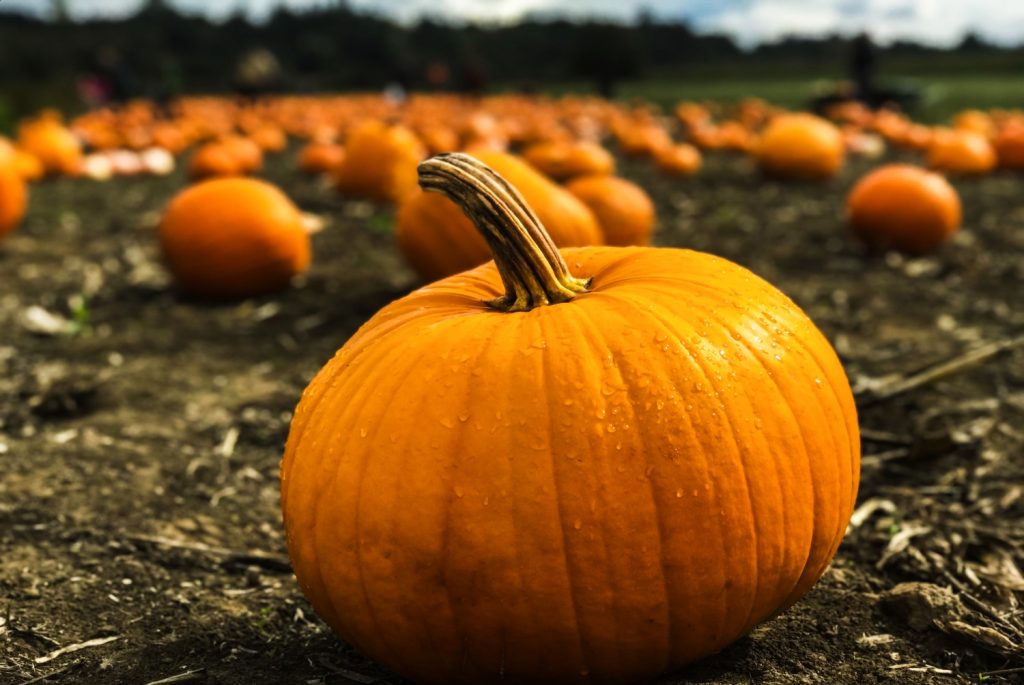
Stage 7: harvest time
And now, the moment you’ve been waiting for — harvest time! At the end of your pumpkin plant’s lifecycle, you’ll finally get to enjoy the fruits of your labor. But, how can you tell when the last of the pumpkin growing stages is near?
When your pumpkin plant’s foliage starts to die back and the vines get brown and crunchy, that’s a good sign that your pumpkins are ready to be picked. Check the pumpkin’s color. It should be a rich, deep, uniform shade of orange. Ripe pumpkins usually weigh anywhere from 2 to 20 pounds, though some varieties can get much larger.
Once the pumpkins are ripe, use a sharp knife to trip the gourd away from the vine leaving 3 inches of the stem attached to the plant. Be sure to wear gloves when harvesting your pumpkin crop. Pumpkin vines are covered in small thorns.
Curing your pumpkins
With your pumpkin crop harvested, that marks the end of the pumpkin growing stages. But there’s still work to be done! You’ll need to cure your pumpkins before they’re ready to be used.
The process is simple. All you need to do is set your pumpkins in a sunny location for two weeks. If it rains or freezes, move the pumpkins to a covered area, as it’s important to keep the pumpkins dry during the curing process.
Curing your pumpkins toughens the shell, which extends the shelf life of the gourds. If you’re not sure what you want to do with your pumpkins, or if you simply can’t use them all at once, curing them buys you some extra time.

Storing your pumpkins
Once your pumpkins have cured, you’ll need to store them in a cool, dry place. Ideally, the pumpkins should be kept at around 60 degrees Fahrenheit, in a place that has good air circulation to prevent dampness.
It’s also important to keep your pumpkins out of direct sunlight. Storing pumpkins in a dimly lit room keeps them fresher for longer. Once you cut into your pumpkin, whether it’s to create a jack-o-lantern for Halloween or to make a delicious autumn harvest soup, it won’t last long.
Carved pumpkins can survive anywhere from five days to several weeks, depending on the weather. The hotter it is, the faster it will rot. If you intend to eat your pumpkins, you’ll be happy to learn that pumpkin slices stay fresh in the refrigerator for up to 12 weeks — so you’ll have plenty of time to make delicious pies, pastries, and casseroles!

How can you save pumpkin seeds for planting?
Observing the pumpkin growing stages is quite a treat, whether you’re an advanced gardener or a beginner. If you want to grow more pumpkins during the next growing season, simply save the seeds from your last crop.
Use a spoon to scrape the innards away from the pumpkin’s flesh. Set the seeds in a colander and rinse them in cool water, then spread them out on a tea towel and blot the excess water away with a paper towel. They may still feel slimy, but that’s okay.
Once they’re clean, spread the seeds out on a cookie sheet lined with parchment paper and allow them to dry for at least a month. Turn the seeds daily to prevent them from sticking and to ensure they dry thoroughly. When your pumpkin seeds have dried, store them in a paper envelope until it’s time to plant again!
Tips for growing the best pumpkins possible
Pumpkins are heavy feeders, and their nutritional needs change in between growth stages. Pumpkins fixate on nitrogen during stages 1 to 3, so fertilize them with manure or blood meal during this time. Once the plants reach stage 4, switch to phosphorous and potassium-rich plant foods, like bone meal.
When you grow your own pumpkins, you get to see the pumpkin growing stages firsthand. But growing pumpkins has other benefits, too. Pumpkins are an excellent source of vitamin A, magnesium, and calcium. Antioxidant-rich and delicious to boot, pumpkins are a healthy addition to any diet — which is just one more good reason to plant your own pumpkin patch during the next growing season.