We’re here to help! Wild Yards is a completely free website that is 100% dedicated to helping you create a wildlife-friendly, sustainable yard. Read more
WildYards is reader-supported. When you buy a product through a link on our site, we may earn a comission. Every product is independently selected by our (obsessive) editors and our reviews are unbiased and objective. Read more about our mission or our privacy policy.
Homemade pickles are hard to beat. But, even if you’re not a fan, raw cucumbers are still a delicious summertime snack, especially when they’re fresh off the vine. Cucumbers are prolific producers. Heirloom varieties typically produce 8 to 10 cucumbers per plant, but some hybrid cultivars can make as many as 20 cucumbers. If you’re new to growing cucumbers, don’t sweat it. These plants are incredibly easy to grow! But understanding the 7 cucumber plant stages of development will help you know what to expect.
Cucumbers are started from small oval seeds, which sprout in 3 to 10 days. Once seedlings develop 3 to 4 sets of true leaves, they’re ready to be moved to the garden. Cucumbers are usually ready to be harvested 50 to 70 days after planting.
Stage 1: Starting seeds
Sowing seeds marks the beginning of the cucumber plant stages. It’s best to start cucumber seeds indoors 2 to 4 weeks before the last expected frost of the season. Fill peat seed pots with potting soil, and sow the cucumber seeds at a depth of ¼ to ½ inch. Use your fingers to gently tamp around the seeds to remove air pockets. Water the seeds well when you’re finished, but avoid overwatering them, or the seeds may drown.
Set your seedlings on a sunny windowsill where they’ll get plenty of light. Although cucumber seeds sprout more efficiently when exposed to low temperatures first, once sown, seeds should be kept warm to encourage germination. Be sure to keep the soil evenly moist as well. If the soil dries out completely, the seeds may die.
If you’re having trouble keeping the seeds warm enough, spread a layer of plastic over the top of them to turn their pots into mini greenhouses. You can also place a heating pad underneath the pots to warm the soil from the bottom up. If everything goes right, your cucumbers will sprout in 3 to 10 days.
Stage 2: Transplanting seedlings
When your cucumber seedlings first emerge, they’ll have a set of seed leaves, or cotyledons, which help the plants make the switch from relying on their seeds for nutrients to being able to make food for themselves. Seed leaves mark the beginning of the second cucumber plant stage, but these smooth, oval leaves aren’t strong enough to support a growing plant. Your cucumber’s seed leaves will soon be replaced with adult leaves, which are elongated with pointed tips and serrated edges.
Once your cucumber plants have developed 3 or 4 sets of true leaves, that’s a good sign that their root systems are strong and healthy. The plants are now ready to be transplanted out into your garden — or into their permanent containers if you plan on gardening in pots. Be careful not to jostle the seedlings about too much during transplanting. Cucumber seedlings are pretty resilient, but if their leaves get torn or their roots break apart, it can severely stress the plant.
Use a hand trowel to dig a hole twice as wide and as deep as the seedling’s seed pot. Place the seedling in the hole and backfill around it, making sure the root collar is level with the surrounding soil. Once you’re finished, water the plants well. It’s important to keep the soil moist in the days following transplanting to prevent shock. Be sure to plant your cucumbers in a spot where they will receive 6 or more hours of sunlight per day. Plants should be spaced 12 to 24 inches apart with 3 to 5 feet in between rows to provide them with plenty of space throughout the cucumber plant stages.
Stage 3: Maturation
If you’re used to planting slow-growing veggies like cauliflower in your garden, then you’re in for a treat because cucumber plants grow lightning-fast by comparison. Just a few short days after transplanting your cucumber seedlings, you’ll notice a surge in foliage development. The plants will spread out and begin growing vigorously.
During this cucumber plant stage, the young plants focus on developing sturdy root systems and producing long vines — both of which help the plants anchor themselves in place. If you haven’t got enough space for your cucumbers to spread out, you’ll need to train them to grow up a trellis at this point to keep them contained.
Cucumbers are considered to be heavy feeders. They require nutrient-rich soil to produce a good crop. How quickly your seedlings reach this cucumber plant stage depends on how fertile their soil is. Ideally, your garden’s soil should be enriched with compost to give it structure and make it more nutritious. But if your soil is nutrient-deficient, you’ll need to feed your cucumber plants during this stage. A balanced NPK fertilizer like 13-13-13 or 19-19-19 will work just fine.
Stage 4: Producing flowers
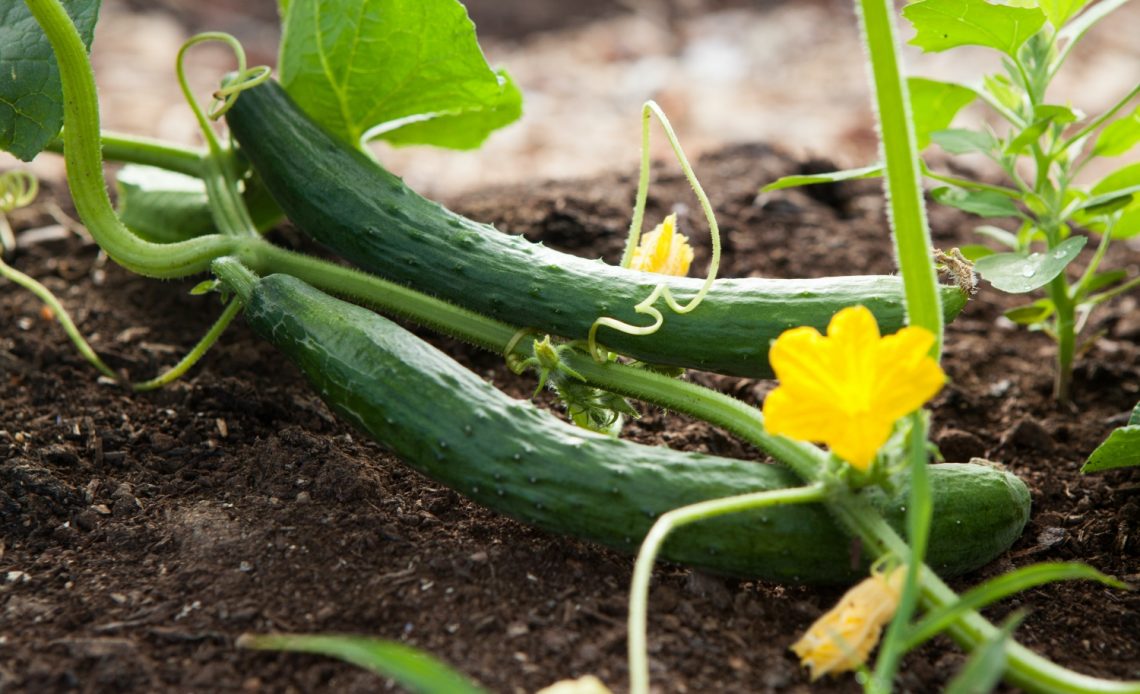
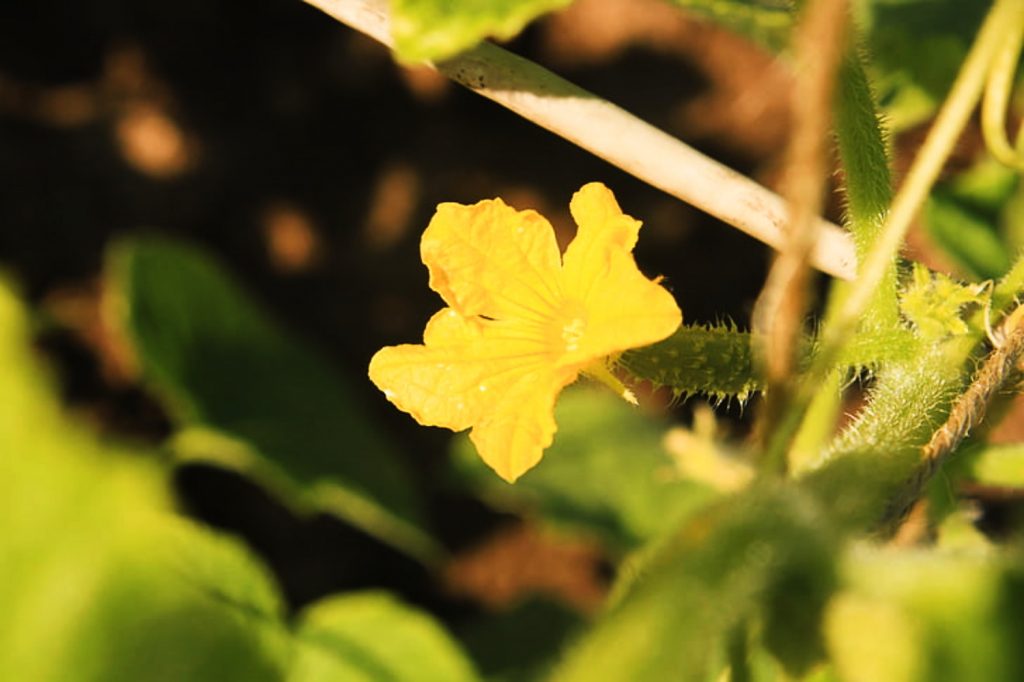
At around 50 to 70 days after first starting the seeds, your cucumber plants will begin producing flowers. Cucumber plants produce both male and female flowers, and a closer inspection will help you tell the two apart. Male flowers emerge at the end of long, thin stems and are usually the first to develop. Female flowers soon follow. These blossoms have a small fruit at the base of the flower, which will become a cucumber if the flower is fertilized.
Unlike other berries (yes, cucumbers are technically berries!), cucumbers are not self-pollinating. The flowers rely on insects and the wind to help them reproduce. You can also help your cucumbers produce more by transferring pollen from male flowers to female flowers using a small paintbrush. Planting cucumbers near flowering companion plants, like sunflowers, can also help attract pollinators.
Once your cucumber plants reach this stage, their water needs will increase. Be sure to keep the soil surrounding your cucumbers moist to the touch. It’s equally important not to overwater the plants at this stage, as doing so may cause the plant to drop its flowers, thereby reducing your crop yield.
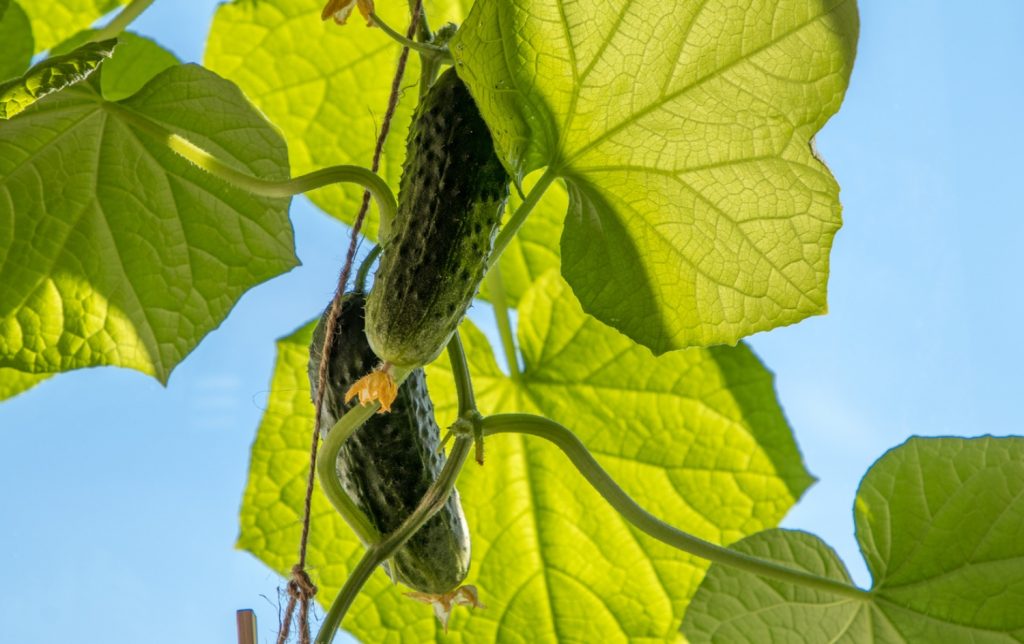
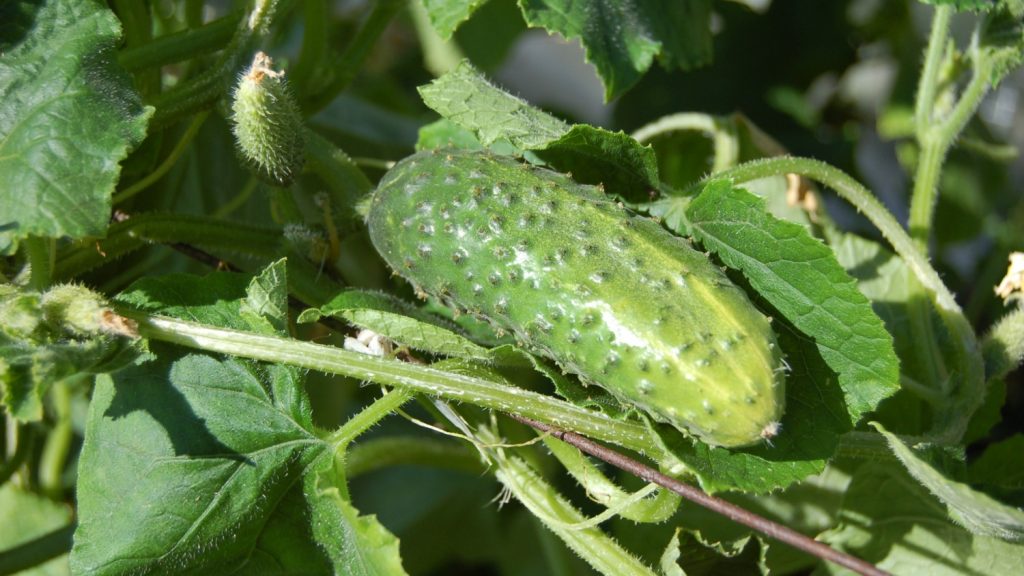
Stage 5: Fruit development
Once a female flower has been pollinated, the small fruit at the base of the blossom will begin to grow. How long it takes for a cucumber to ripen depends on how well the plant’s growing requirements have been met. In ideal conditions, most cucumbers will ripen in 7 to 14 days. If your cucumbers are growing in nutrient-deficient soil, or if they aren’t getting enough water, it may take the fruits longer to ripen. In some cases, the fruits may fall off the vine as the plant attempts to conserve energy.
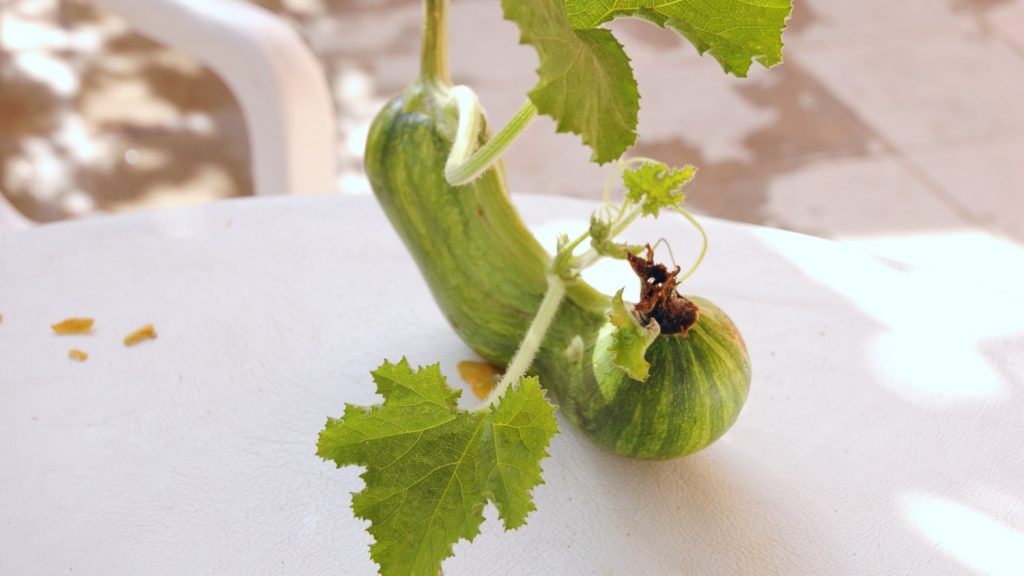
The fruits typically start out green, though they may have a white or yellow hue early on, especially at the bottom of the fruit. As the cucumbers mature, their color will deepen and become more uniform. Most cucumbers are light to dark green, but some cultivars, like lemon cucumbers, are yellow when ripe, just like the fruits they’re named after.
Stage 6: Harvest time
And now, the cucumber plant stage we’ve all been waiting for — harvest time! Cucumbers are ready to be harvested a week or two after they first begin to develop. But exactly when you harvest your cucumbers depends on what you plan on doing with them.
If you plan to make pickles, harvest your cucumbers when they measure 2 to 4 inches in length. That’s when the cucumbers are at their sweetest and most tender. As the fruits mature, they’ll lose some of their sweetness. But their crisp, fresh flavor is still suitable for snacking. If you enjoy raw cucumbers, wait until the fruits measure around 6 inches before plucking them from the vine.
It’s important to harvest your cucumbers as soon as they’re ready. This encourages the plants to produce more fruits. The longer the fruits stay on the vine, the tougher they get and the more seeds they’ll have. Remove overripe, rotted, and/or insect-infested fruits from the vine to help the plant conserve energy.
Stage 7: Dying back
The fruiting period lasts 4 to 6 weeks on average before cucumbers reach their final stage. However, this is just a general rule. Some cucumber varieties can continue producing for much longer than that. English cucumbers (also known as burpless cucumbers), for instance, have a long fruiting period that typically lasts 4 months.
Regardless, once your cucumbers have finished producing fruits, they’ll start dying back. Cucumbers are annual plants, meaning they complete their entire life cycle in one growing season. After the last cucumber is harvested, the plants will stop growing, the vines will dry up, and the leaves will fade.
At this point, it’s safe to uproot your cucumber plants and toss them onto the compost heap. Alternatively, you can till the plants into the soil and allow the plot to rest until the following growing season. If you intend to grow more cucumbers next year, be sure to amend the soil with plenty of compost to replace lost nutrients. Kelp meal, bone meal, and blood meal can also be added to enrich the soil at the end of the season.
Can you save cucumber seeds to start new plants?
Yes, you certainly can! To save cucumber seeds, allow one or two cucumbers to stay on the vine until they turn yellow and develop a tough, waxy skin. Once the cucumbers are overripe, remove them from the plant and allow them to cure in a cool dry place for 2 to 4 weeks, to give the seeds time to mature.
When the cucumbers are ready, cut them in half lengthwise and use a spoon to scoop out the seeds and innards. Dump the seeds into a colander, and rinse them under cool water. The seeds may feel slightly slimy even after rinsing them, but that’s okay. Just lay them out on a tea towel and pat them dry.
Next, spread the seeds out on a cookie sheet lined with wax paper and set them in a cool place to dry. Be sure to stir the seeds every day so they don’t stick together. Your seeds should be nice and dry in 2 to 4 weeks, at which point you can collect them and store them in a paper bag or envelope until you’re ready to start planting again.
How can you grow the healthiest cucumbers possible?
Growing healthy cucumbers is just a matter of meeting all of the plant’s growing requirements from the moment you sow the seeds to the final cucumber plant growing stage. Grow your cucumbers in nutrient-rich, well-draining soil. Water the plants regularly so the soil stays moist, but not muddy. Amend the soil with compost and other organic materials to keep the cucumbers well-fed. And, lastly, make sure the plants get enough sunlight.
Fulfilling your cucumber crop’s basic requirements is key to a successful harvest. If you’ve grown cucumber plants in the past, only to be disappointed when the plants fell prey to insects, there are a few things you can do to help. First, grow your cucumbers near the right companion plants. Nasturtiums, marigolds, and dill can help repel beetles, aphids, and other pesky insects from your cucumber plants, all while attracting beneficial pollinators who will help boost your crop yield.
If your cucumbers are in the midst of a serious bug problem, then you’ll need to act fast. Hose the leaves off, allow them to dry, then apply a homemade insecticide to kill and repel unwanted pests. For severe infestations, consider using diatomaceous earth to eliminate the insects. Diatomaceous earth is highly effective and causes insects to dehydrate in a matter of hours.
More tips for growing cucumbers
In addition to meeting all of your cucumber’s growing requirements, there are a few other things you can do to encourage the plants to grow well. First, spread a layer of mulch around the base of the plants to keep the roots cool and help the soil retain moisture. Next, use a trellis to support the plants. Keeping the vines up off the ground improves air circulation, which helps prevent disease. It also keeps the fruits out of reach of garden pests.
Cucumbers are some of the easiest garden veggies to grow, and some of the most rewarding, too. When planning your garden for the upcoming growing season, be sure to include a row of cucumbers so you can enjoy watching the cucumber plant stages in action.