We’re here to help! Wild Yards is a completely free website that is 100% dedicated to helping you create a wildlife-friendly, sustainable yard. Read more
WildYards is reader-supported. When you buy a product through a link on our site, we may earn a comission. Every product is independently selected by our (obsessive) editors and our reviews are unbiased and objective. Read more about our mission or our privacy policy.
Growing asparagus can be a challenge, even for a seasoned gardener. These nutritious veggies can take 2 to 4 years before they produce a good crop, and they require patient and consistent care to reach maturity. But, the good news is that asparagus is perennial. So, once the plants get settled, they can keep growing and may live for 15 to 30 years. Asparagus is hardy from zones 3 through 10 and thrives in cool, moist conditions. If you’re new to planting asparagus, understanding the asparagus growing stages will help you care for the plants properly so you can harvest the healthiest spears possible.
Asparagus is usually started from crowns, but plants can also be started from seeds. If you wish to grow your asparagus as an annual, you can begin harvesting shoots the first year. However, if you want your asparagus to return year after year, you’ll need to avoid harvesting the plants to give them time to become established.
Stage 1: starting young asparagus plants
There are two ways to start asparagus — from seeds and from crowns. Understanding what is involved in both of these methods will help you decide which one will work best for your garden.
Starting asparagus from seeds
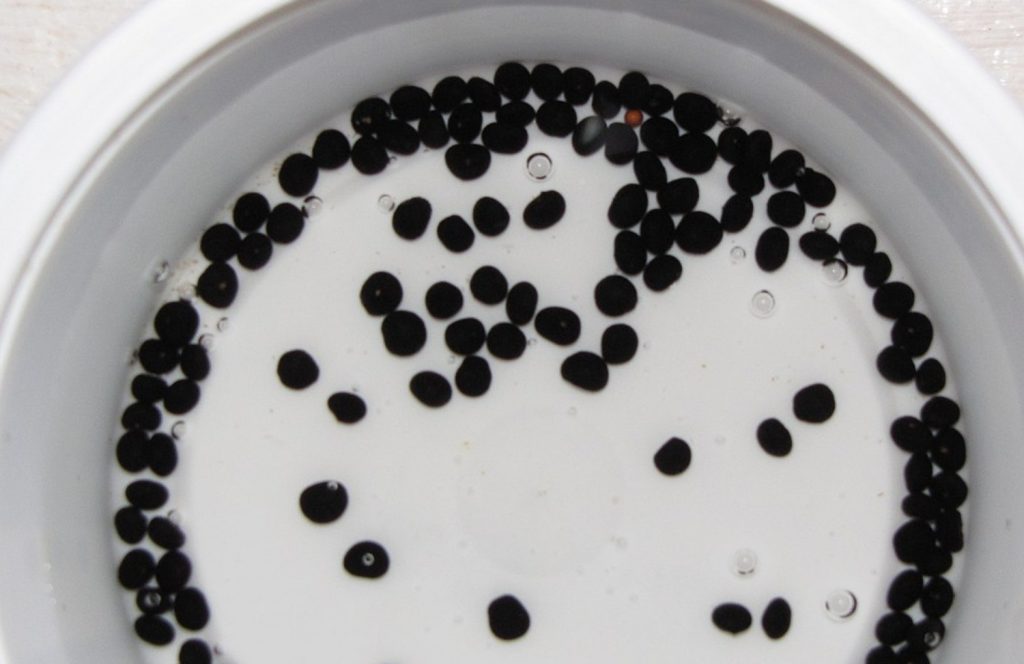
Start your asparagus seeds indoors 10 to 12 weeks before the last frost of the season. Asparagus seeds have a hard outer layer, so they can be slow to start. Soaking your asparagus seeds in warm water for 24 hours before planting softens that tough membrane, allowing them to germinate faster.
Once the seeds have soaked, sow them at a depth of ½ inch in peat seed pots filled with potting soil. Asparagus seeds are more likely to germinate if their soil is kept warm and moist. Water the seeds regularly, but avoid muddying the soil, otherwise, the plants may drown. Place the seed pots on a sunny windowsill, and use a heating mat if necessary. Seeds typically germinate in 14 to 21 days, although some plants take much longer. Once the seeds sprout, a grow light can be used to promote strong stems.
When the seedlings reach 6 to 8 inches tall they’re ready to be moved to the garden. Dig a trench 6 to 8 inches deep and 12 to 18 inches wide, and place the asparagus seedlings inside. The plants should be spaced 12 to 18 inches apart to give them room to spread out. Cover the plants with 2 to 4 inches of soil, to begin with, and continue covering them as they grow until the soil in the trench is even with the surrounding soil. Water the plants well after transplanting them.
It’s worth noting that asparagus seedlings aren’t as hardy as young squash and tomato plants. Be sure to handle the seedlings gently during the transplanting process. Asparagus plants can be quite fragile, so avoid jostling them about too much, and be careful not to cut into their roots by accident. Treating the seedlings delicately will help make the transplanting process as smooth as possible.
Starting asparagus from crowns
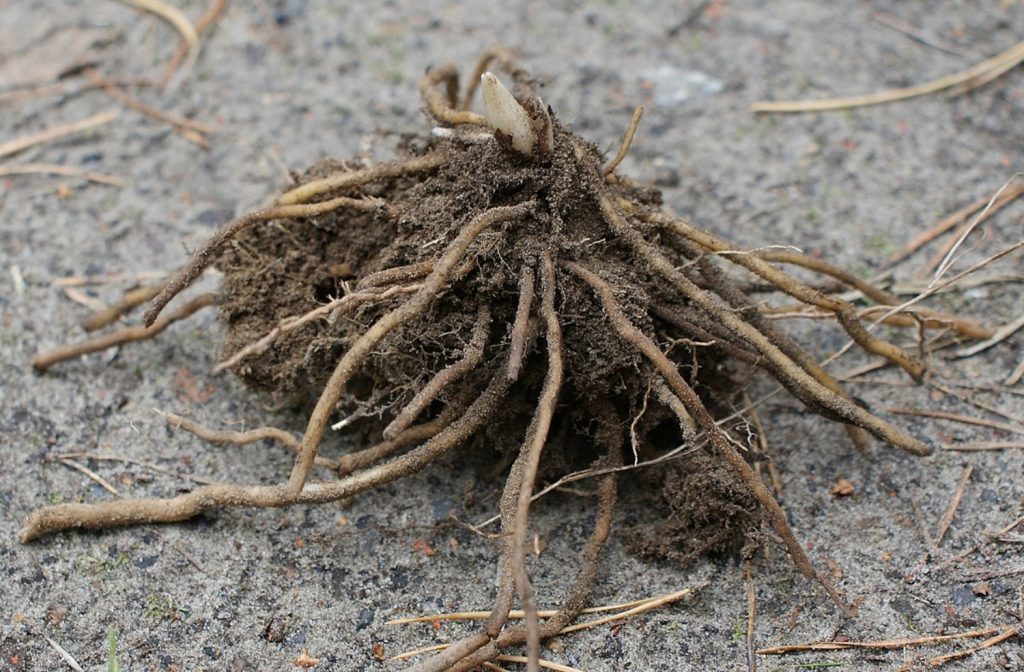
Most gardeners start their asparagus crop from crowns, which are the roots of one-year-old plants. Crowns are much more resilient than seeds and they tend to take quickly. By starting the crowns directly in your garden, you eliminate the hassle of having to transplant the oh-so-delicate seedlings. Another advantage to growing asparagus from crowns is that the plants tend to mature more quickly than those grown from seeds, so you can enjoy a harvest much sooner.
As with asparagus seeds, you’ll need to soak your asparagus crowns in water before planting them. Asparagus crowns are dormant, and rehydrating them helps to wake them up again. Make a tea from some homemade compost and leave the crowns in a bucket to drink it overnight.
Once the crowns have been soaked, they’re ready to be planted. The process is the same for crowns as it is for seeds. Dig a trench 6 to 8 inches deep by 12 to 18 inches wide. Plant the crowns 12 to 18 inches apart. Then, cover them with a few inches of soil and water them well. Check the soil level every 2 or 3 weeks and add more soil as necessary.
Asparagus seeds are nowhere near as easy to start as other garden favorites, like watermelons or pumpkins. So, if you’re new to growing asparagus, starting your crop from crowns will lead to less frustration.
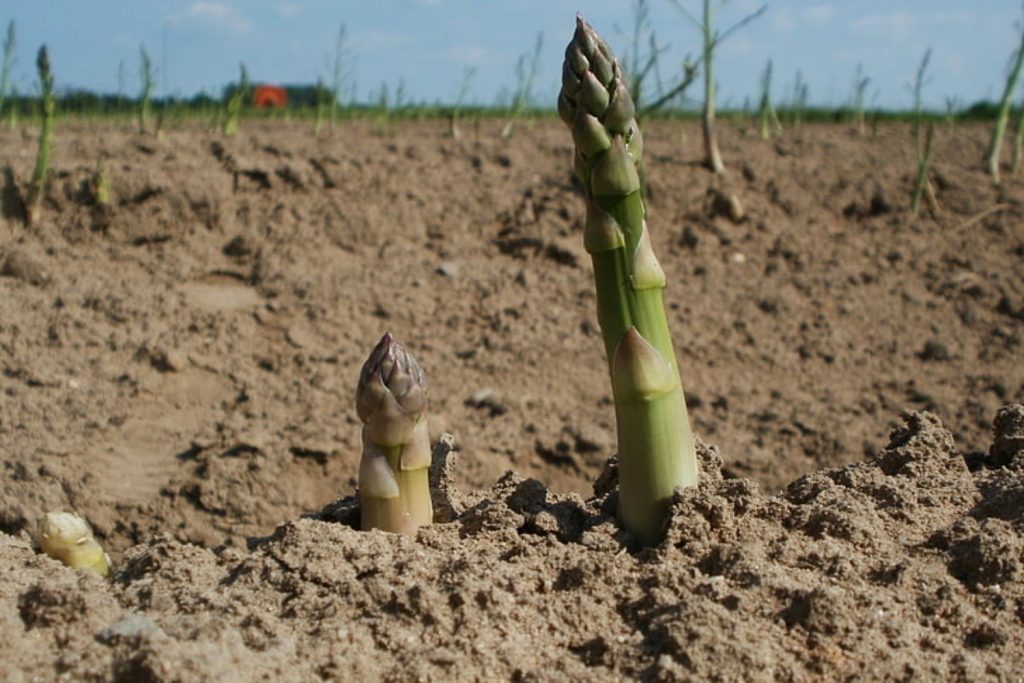
Stage 2: harvest/early growth
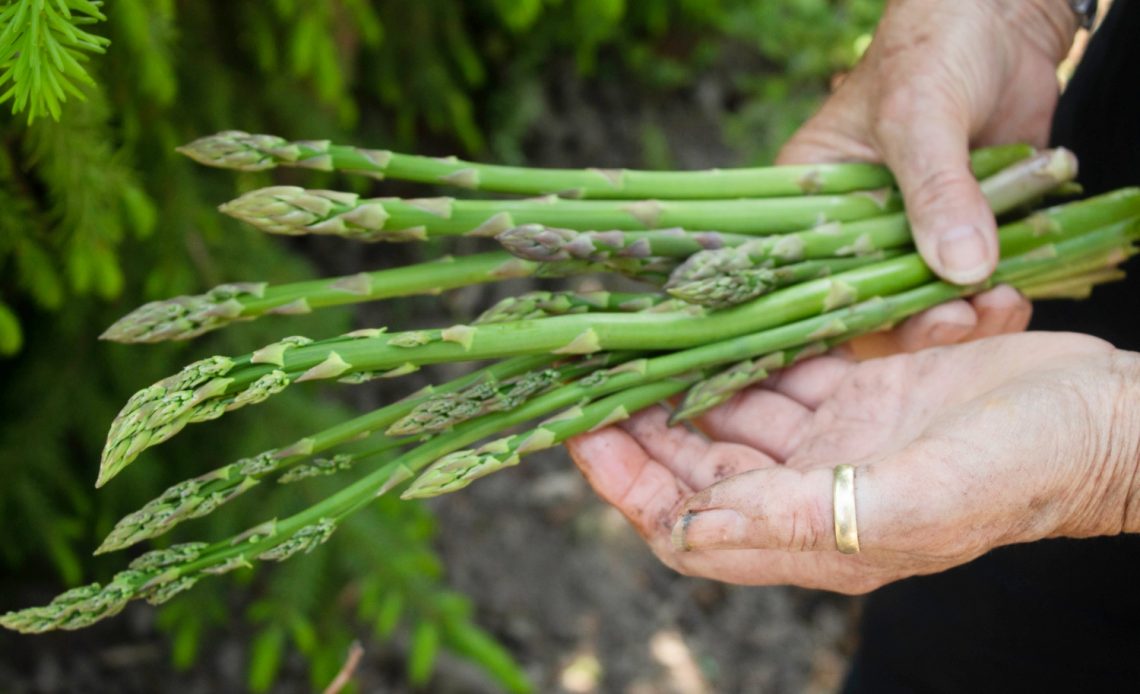
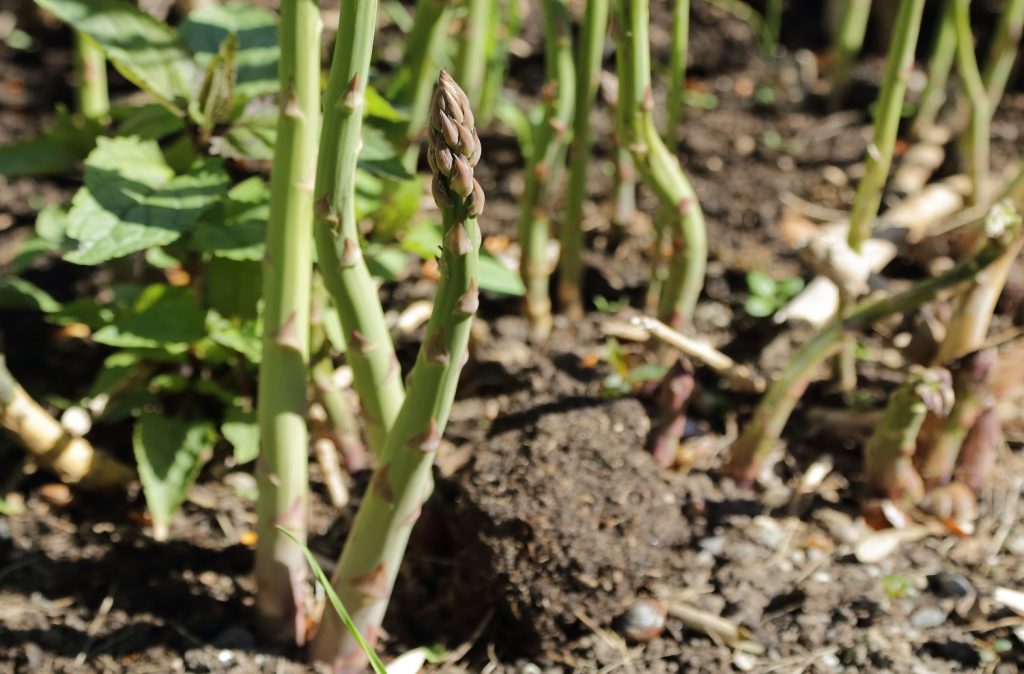
During the second asparagus growing stage, you’ll see young shoots emerging from the soil. This is the stage at which mature plants can be harvested. Younger plants that have only been in the garden for a season or two will be relatively thin. Some of these shoots are no bigger around than a pencil. However, in spite of their small size, they’re still edible. In fact, many gardeners prefer to grow their asparagus as annuals just so they can harvest these tender baby spears.
Spears usually start growing when soil temperatures reach 50 degrees Fahrenheit. Asparagus plants perform best in cool weather and in moist soil. If you live in an exceptionally dry, arid region, it may take longer for your asparagus to grow. But, when all of the plant’s growing requirements are met, they can grow up to 2 inches each day during this stage of development.
This asparagus growing stage can last between 6 and 8 weeks and usually takes place in late spring to early summer, depending on your growing zone. If this is your asparagus crop’s first growing season and you want to grow the plants as perennials, avoid harvesting any of the spears to help them get established. If your asparagus is several years old, the spears can be harvested when they measure 8 to 10 inches long. Any longer than that and the spears will be tough and stringy.
Use a sharp pair of scissors or a knife to harvest the spears. Trim each spear off at ground level, being sure to make clean cuts. It’s important to avoid damaging the plants so they can continue to grow.
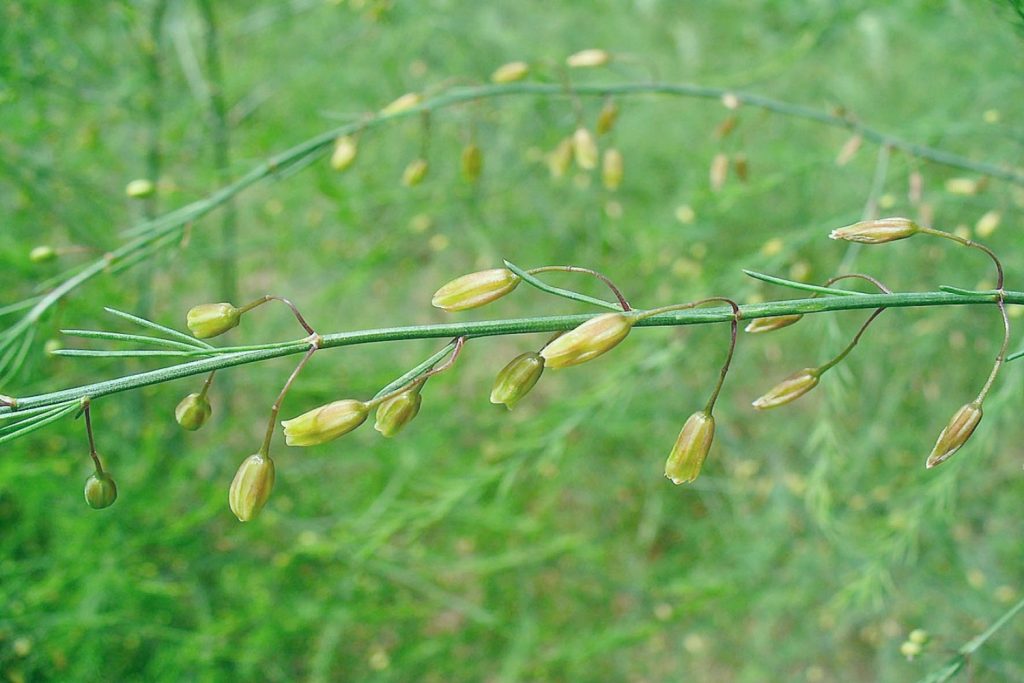
Stage 3: flowering/ferning out
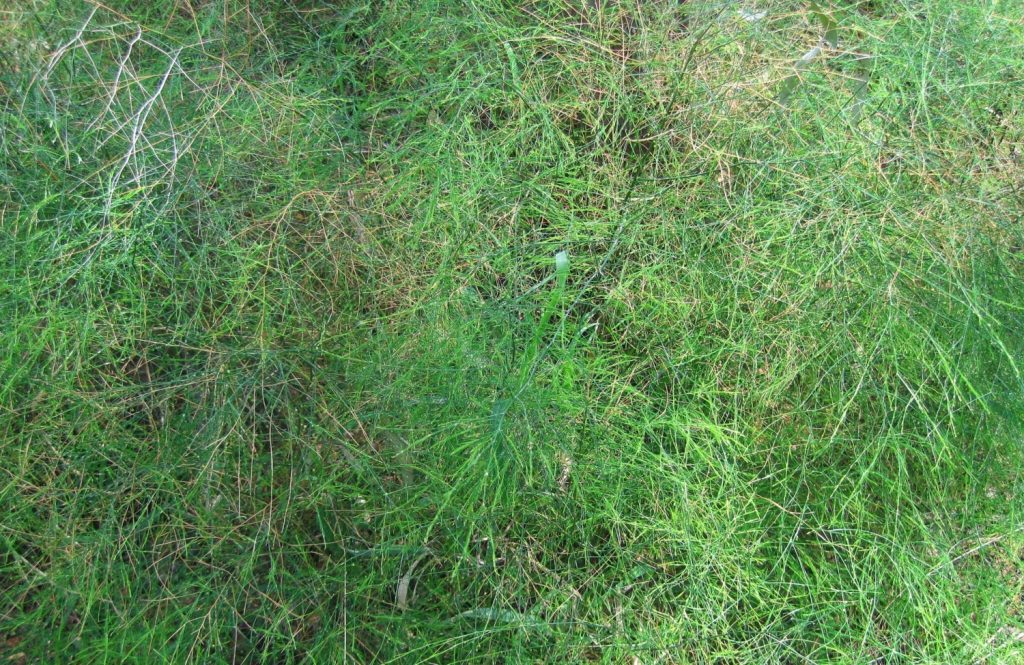
After the early growth/harvest period, the plants will start ferning out. During this asparagus growing stage, those fast-growing shoots become tall fern-like plants, similar in appearance to bamboo. If you’re new to growing asparagus, this can take you by surprise, since the plants can grow up to 6 feet tall.
As you might’ve guessed, during the ferning out phase, your asparagus shoots will develop fern-like leaves at the ends. Shortly after the foliage comes in, plants produce small, bell-shaped flowers that are pale green, yellow, or white in color. Though the flowers are not particularly showy, they attract the attention of local pollinators.
Once the flowers have been visited by your neighborhood bees, the plants produce small red berries. These berries contain a toxic substance called asparagine, so asparagus berries should not be consumed. However, they are sometimes used as a diuretic in holistic medicine.
Asparagus is not edible during this stage of its growth cycle. However, flowering is critical to the plant’s survival. If you want your asparagus crop to come back year after year, then allowing it to fern out is a must. You should avoid trimming the asparagus plants at any time during this period. Allow the stalks to grow freely and flower without interfering to promote strong growth during the next season.
Stage 4: dormancy period
After the plants are finished flowering and have released their seeds, the foliage will begin to die back. This is all part of the normal asparagus growing stages. If you’re new to growing asparagus, you may wonder if you should trim the plants back once they start dying. But pruning away the foliage, even at this point, can stunt the plant’s development in the future.
Although asparagus plants can be delicate, once they start growing, they don’t like to be fussed over. While you may need to provide young asparagus plants with some extra TLC, once the plants get established, it’s best to leave them alone. Only prune away stems and branches if they are showing signs of insect infestation or disease.
Your asparagus plants will go dormant in the fall or winter to rest from the previous growing season and prepare for the next one. In warmer climates, asparagus plants may not go fully dormant, however, their growth rate will slow significantly until the next spring.
Stage 5: growing again
Annual garden favorites, like okra and cucumbers, have a very linear growth progression. They start from seeds, they grow, they flower and fruit, then they die. But with asparagus, it’s all one big cycle. After their winter dormancy, the plants sprout up and start the process all over again.
In early to mid-spring, you’ll notice purple-hued asparagus tips peaking out from beneath the soil in your garden. This can catch you by surprise, since the shoots may start to emerge before the final frost of the season. If they do, be sure to cover them with plastic to keep them warm and prevent freeze damage. As the temperatures warm up to a more comfortable level, the shoots will grow much more quickly.
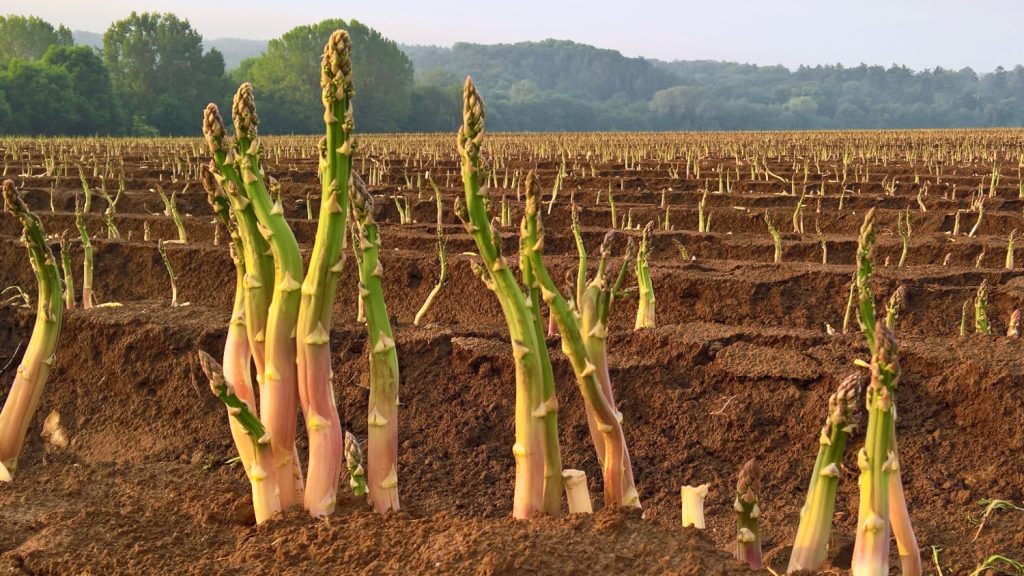
Stage 6: harvesting spears
If your asparagus is still getting established, then you’ll need to forego the harvesting period for another year or so. But if your asparagus is growing great, then you can finally gather your first crop.
Remember to harvest your asparagus when it’s around 8 to 10 inches in length. This is when the shoots are at their most tender. Trimming the shoots away when they’re shorter than that could stunt their growth or kill them off entirely.
If you want to grow asparagus as a perennial, but you also want some homegrown shoots to enjoy this season, plant an extra row to grow as annuals. This way, you can still enjoy a harvest while you wait for your permanent asparagus plants to get established.
How to grow healthy asparagus spears
Growing asparagus is a commitment. The last thing you want is to wait years and years for a harvest only to bite into asparagus spears that are flimsy and tasteless. Taking good care of your asparagus plants from the very beginning will ensure that you grow nutritious, delicious, healthy spears that your whole family can enjoy.
Choose the right planting site
Regardless of how you decide to start your asparagus crop, it’s vital that you choose the right planting site. Asparagus likes cool weather, but it also likes warm soil. Ideally, you should plant your asparagus when temperatures are between 50 and 70 degrees in a spot where it can receive at least 6 hours of sunlight every day.
If your growing zone tends to stay cooler than 50 degrees, you’ll need to make sure the plants get a minimum of 8 hours of sunlight daily. Conversely, if you live in a hotter climate, your asparagus plants should be planted in a spot where they will receive 6 hours of morning sunlight, and plenty of dappled afternoon shade.
Amend the soil as necessary
Once you’ve made sure your asparagus plants will get enough light, it’s time to take a closer look at the soil. Asparagus plants grow best in loamy soil that drains well, but that also contains enough organic matter to help it retain a touch of moisture. If your soil is clay-rich or overly compacted, amend it with compost or manure. This will help loosen things up so the plants can get established more quickly.
The soil should have a slightly acidic to neutral pH of 6.0 to 7.0. Use an at-home soil test kit to determine your soil’s pH level. If your native soil is too acidic, add lime to raise the pH a bit. And, if the soil tests as overly alkaline, you can use sulfur to neutralize it.
Water the plants regularly
Your asparagus won’t grow well if it’s sitting in muddy soil, but it won’t grow at all if the soil stays dry for long periods of time. Although these plants become slightly more drought-resistant as they age, they still perform best when their soil is kept moist.
Water your asparagus plants thoroughly once or twice a week to encourage the plants to grow deep roots. Check the soil every other day to make sure it stays damp. Stick your finger an inch below the surface. If the soil feels dry, your asparagus needs another drink.
If you find that the soil your asparagus plants are growing in dries out too quickly in between waterings, spread a layer of wood chip mulch around the base of the plants. This will prevent rapid moisture loss due to evaporation.
Fertilize the plants
Asparagus plants are considered heavy feeders. They need a steady supply of vitamins and minerals to continue growing. If your soil is nutrient-deficient your asparagus crop won’t grow very much. Young plants may fail to become established and die off before you get a decent harvest.
Be sure to feed your asparagus crop early in the spring as the shoots emerge. This will ensure the plants have all of the nutrients they need to grow well. Balanced moderate-dose N-P-K fertilizers like 13-13-13 work best. These fertilizers can be absorbed quickly and contain the right doses of the three nutrients your asparagus plants need most. Avoid applying fertilizer after midsummer, since this can encourage new growth that won’t have time to harden off so late in the season.
Remove surrounding weeds
Since asparagus plants require lots of nutrients, they can’t handle any competition. You’ll need to weed your asparagus patch often to make sure the crops get all of the vitamins and minerals they need to produce. If you’re having trouble staying on top of your weed problem, consider spreading landscape fabric or applying a thick layer of mulch to prevent the pesky plants from sprouting up.
Be vigilant about pest control
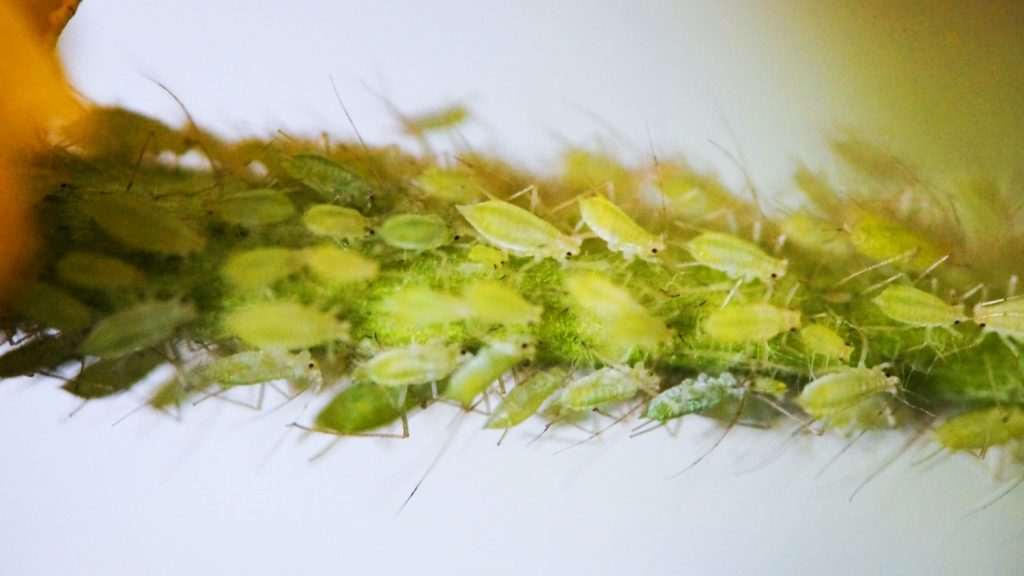
Asparagus plants are somewhat susceptible to pests, and, to make matters worse, they don’t have a strong resistance to insects. So you’ll need to keep a careful eye out for bugs and apply an all-natural homemade insecticide to the plants at the first sign of an infestation. Examine the plants regularly for aphids, spider mites, and beetles. If you’ve had problems with these bugs in the past, consider releasing predatory insects like ladybugs and lacewings, to help keep the pest population under control.
More tips for growing asparagus
In addition to meeting all of your asparagus crop’s sun, soil, and water requirements, there are several other things you can do to encourage healthy growth. Plant your asparagus near the appropriate companion crops to repel harmful insects, amend the soil at the start of each season with aged manure to replenish lost nutrients, and fertilize as necessary from spring to summer to ensure healthy growth.
Growing asparagus can be a chore, but to the dedicated gardener, it’s a labor of love. Understanding these 6 asparagus growing stages will help you provide your crop with the best care possible.