We’re here to help! Wild Yards is a completely free website that is 100% dedicated to helping you create a wildlife-friendly, sustainable yard. Read more
WildYards is reader-supported. When you buy a product through a link on our site, we may earn a comission. Every product is independently selected by our (obsessive) editors and our reviews are unbiased and objective. Read more about our mission or our privacy policy.
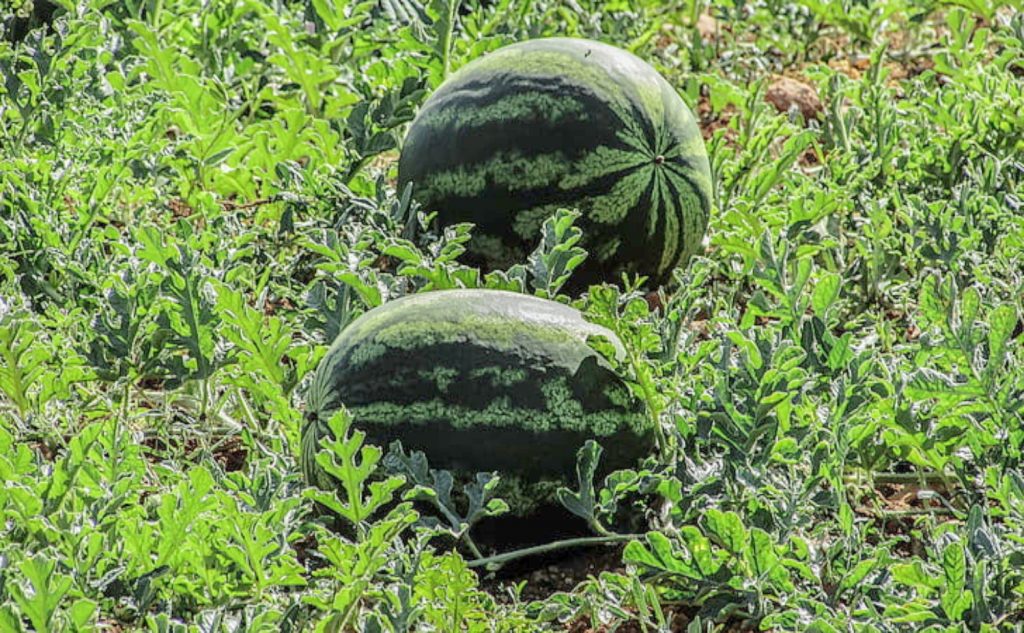
Summer wouldn’t be the same without fresh homegrown watermelons to enjoy. Although watermelons need plenty of room to grow, they aren’t particularly difficult to care for, which makes them a great plant for beginner gardeners. These fuss-free plants are hardy from zones 2 through 11 and thrive in loamy soils and full sun conditions. If you’re new to growing watermelons, knowing the watermelon growing stages will help you understand what you can expect as the plants grow and mature.
Watermelon seeds usually germinate in 7 to 10 days, although they may take up to 3 weeks to sprout. Once the seedlings have developed true leaves, they’re ready to be transplanted into the garden. Within weeks, the plants produce flowers which, once pollinated, give way to small fruits. Watermelons mature in 45 days on average.
Stage 1: watermelon seeds and seedlings
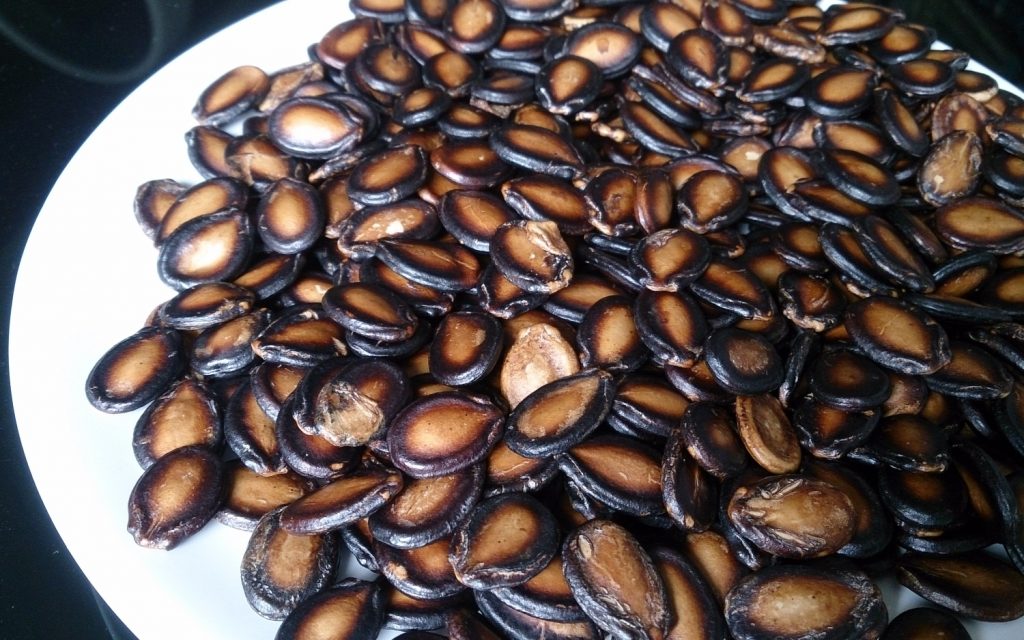
Black and tan striped watermelon seeds are shaped like tiny teardrops and usually measure ⅜ to ½ inch in length. Like pumpkins, watermelons are easy to grow from seeds. You can start your watermelon seedlings in peat seed pods filled with potting soil 3 to 4 weeks before the last frost of spring. Sow the seeds at a depth of ½-inch, and water them well. Keeping the soil moist to the touch is key as this will help the seeds germinate quickly. Just be careful not to flood the little pots with water, as this may drown the seeds.
Set the seed pots on a sunny windowsill so they get plenty of light. Keeping the seedlings warm is crucial. Watermelons love the heat, so don’t let your seedlings get too cold, or they may die. You should see the seeds begin to sprout within 7 to 10 days if the conditions are right. However, some seeds may take up to 3 weeks before they germinate.
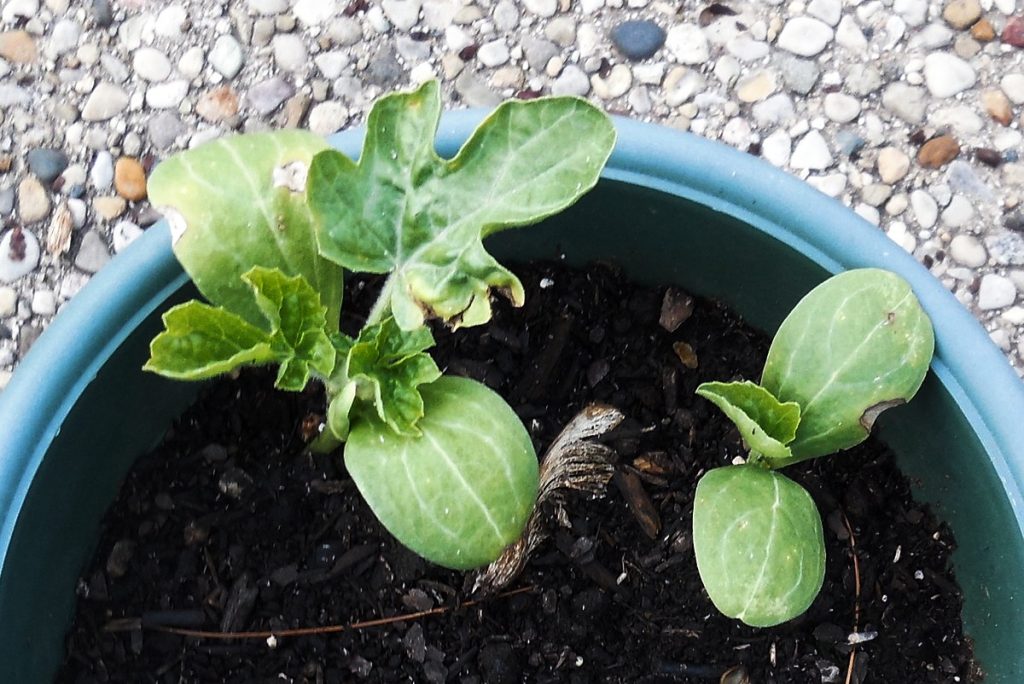
On warm days, when the temperatures reach the 70s and higher, place your seeds in a sunny spot outside. This will help them acclimate to the outdoors, so they have an easier time adjusting once they’ve been transplanted into your garden. When your seedlings emerge, they will have a pair of bright green oval seed leaves.
Stage 2: developing true leaves
Your watermelon seedlings rely on their seed leaves to help them survive, but those two little leaves aren’t enough to support the energy needs of a growing plant. In 5 to 10 days after your seeds have germinated, your seedlings will begin to develop true leaves. These leaves take the shape of the plant’s adult leaves and sprout up and out from in between the seed leaves.
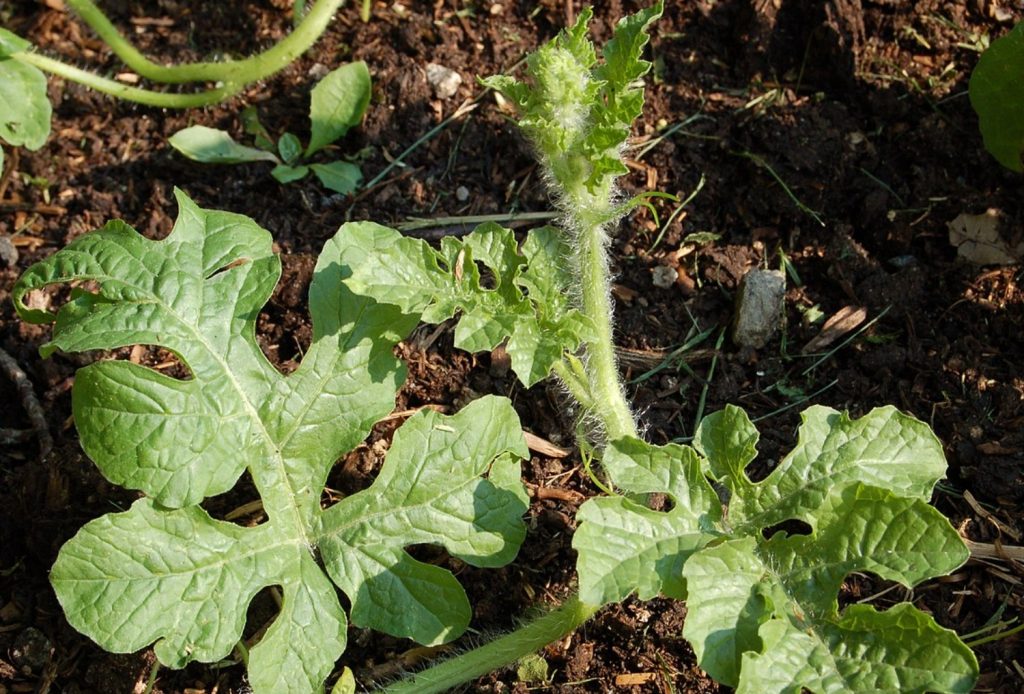
True leaves are much larger than seed leaves. The greater surface area enables the plants to photosynthesize more efficiently as they grow. The exact shape of your watermelon’s adult leaves depends on their variety. However, in general, watermelons produce large, lobed leaves with smooth edges. The leaves may feel fuzzy to the touch, like other members of the cucurbit family.
Once your watermelon plants have developed 1 or 2 sets of true leaves, they’re ready to be moved to your garden. This is the ideal watermelon growing stage for transplanting when the roots are still growing. Avoid waiting too long to move your watermelon plants, otherwise, they may become rootbound in their seed pots.
Stage 3: growing vines
Once you’ve moved your watermelons to your garden, the plants will spend a few weeks getting established before they start to spread out. During this watermelon growing stage, the plants begin to focus on producing vines. Within another month, these vines will support flowers, and, eventually, watermelons.
Your watermelons should begin producing vines 3 to 5 weeks after transplanting. These vines can grow up to 12 feet long, and each vine can produce additional vines. How large your watermelon plants will grow depends on their variety and how well their growing requirements are met. But, in general, watermelon plants can spread out 10 to 20 feet.
In addition to producing flowers and fruits, your watermelon’s vines help to anchor the plant so it doesn’t blow away. The tendrils will cling to anything to help the plant stabilize itself. So be sure to space your watermelons far enough apart to prevent them from smothering each other or the other plants in your garden.
Stage 4: flowering
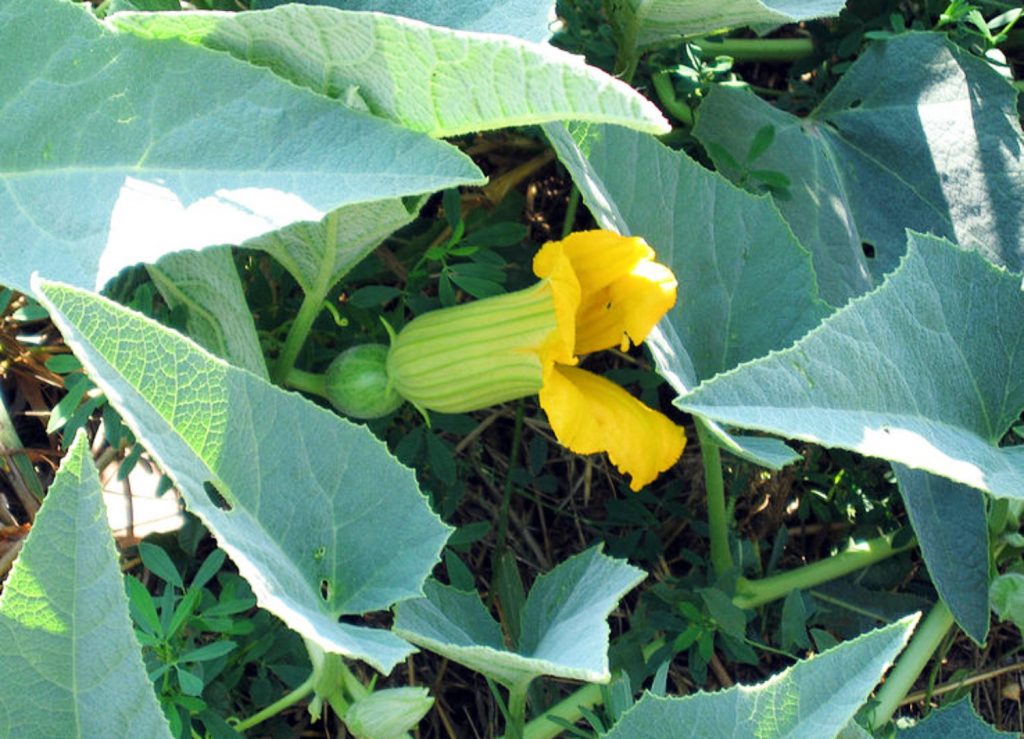
After 2 to 4 weeks, your plants will enter a new watermelon growing stage. Vine production will slow and stabilize as the plants shift their focus to producing blossoms. Watermelon plants produce bright yellow flowers, just like cucumber plants and squash plants. These yellow flowers are filled with nectar and pollen to attract bees and butterflies.
Unlike blackberry bushes, watermelons are not self-pollinating. They rely on insects to help them reproduce. However, you can also hand-pollinate the flowers by transferring pollen with a small paintbrush. If the plants are not properly pollinated, they won’t produce very many melons.
Watermelons produce both male and female flowers. To distinguish between the two, look just below the blossom itself, where the flower meets the stem. Male flowers have short, thin stems. But female flowers have a small round fruit at the base of their bud. Each of these immature fruits has the potential to become a full-grown watermelon, which takes us to the next watermelon growing stage.
Stage 5: watermelon formation
Now things are getting exciting! After weeks of caring for your watermelon plants, they’re finally starting to produce watermelons. Once your watermelon’s female flowers have been pollinated, the fruits begin to develop. Tiny green watermelons the size of marbles will start to dot your watermelon plant alongside all of the yellow blossoms.
As the melons grow, they develop the light green stripes characteristic of mature watermelons. Soon, the flower at the end of the melon dies and falls off. Interestingly, watermelons aren’t technically melons at all. They’re actually just large berries — and so are cucumbers, pumpkins, and cantaloupes. These fruits are scientifically classified as “pepos”, berries that produce multiple flat seeds and pulpy flesh encased in a thick rind.
When your watermelons begin producing fruits, their nutritional needs increase dramatically. It’s important to fertilize your watermelons with compost during this growing stage to ensure the plants have all of the vitamins and minerals they need to keep making fruits. Your watermelons will also use more water during this time, so check the soil regularly and keep them on a watering schedule to prevent them from drying out.

Stage 6: growing and maturing
Baby watermelons grow pretty fast initially. But after a few weeks of rapid development, their growth rate slows down significantly. As the melons reach their mature size, it can sometimes seem like time is standing still. Just how long does it take for a watermelon to reach its full size, anyway?
After pollination, watermelons typically take 45 days to mature. However, this timeline can vary depending on several factors. For starters, temperature plays a big part in determining how fast your watermelons mature. These plants prefer warm weather and will produce fruits more quickly when the thermometer stays between 70 and 80 degrees. If temperatures in your growing zone regularly cool down into the 50s overnight, this can slow watermelon production. But extreme heat can stunt melon growth, too.
Additionally, the more watermelons you find on a plant’s vines, the longer it will take for those melons to mature. This is even more true if your watermelon plants don’t have enough nutrients, sunlight, or water to meet all of their energy demands. Inspect your watermelons regularly and trim rotting melons off of the vine to help the plant conserve energy. Dead leaves and blossoms should also be removed whenever you see them.
Keeping an eye out for insects can also help your watermelons mature more quickly. Aphids, spider mites, and other sap-sucking bugs can quickly drain plants of energy, resulting in poor crop production. Examine your watermelon’s foliage regularly and apply an all-natural homemade insecticide at the first sign of an infestation.
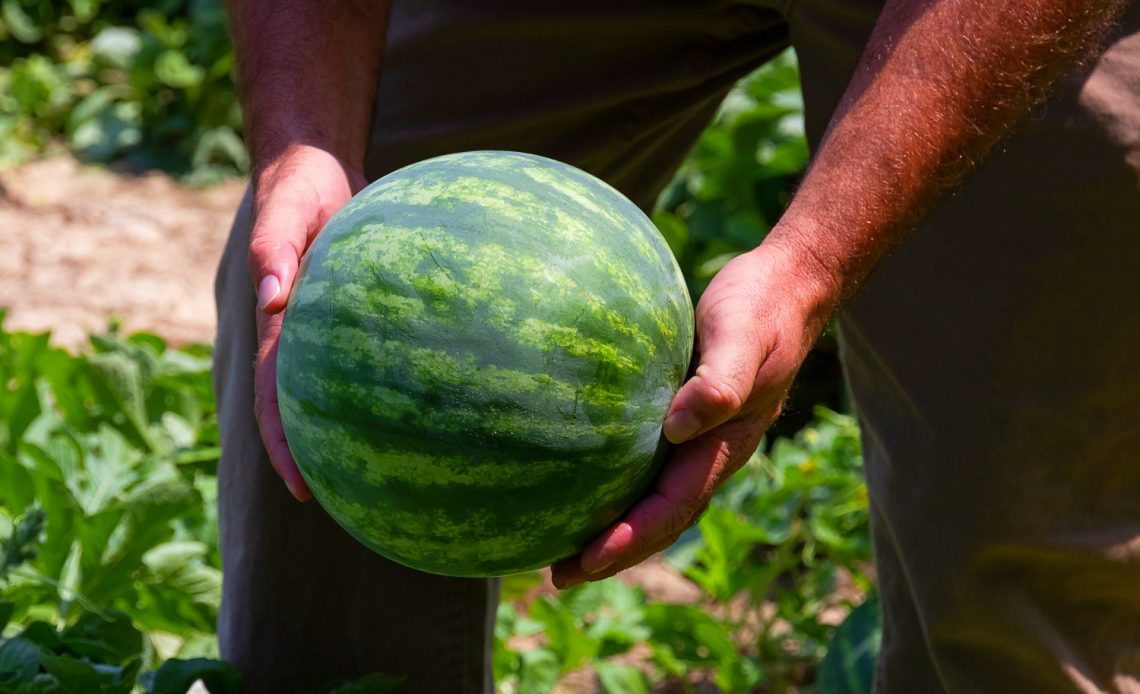
Stage 7: harvest time
Once your watermelon has reached the end of its growing stages, it’s time to harvest! What your watermelons will look like once they’re ripe depends on their variety. Double-check your seed packet to get a better idea of how your watermelons will appear once they’ve matured.
Of course, there are a few other ways to tell if a watermelon is ripe. Tap the watermelon on the end. If it produces a metallic sound, it isn’t ready to be picked yet. But if it sounds hollow, it’s ripe. The underside of the melon, where it was resting on the ground, should have a rich yellow hue. You may also notice the vine the melon is attached to is turning brown and dying.
Once you’ve determined that a watermelon is ready to be picked, use sharp scissors or a knife to cut it from the vine. Unlike pumpkins, watermelons do not need to be cured before they can be consumed. So the minute you harvest your watermelons, you can split them open and start enjoying the fruits of your labor!
Watermelons are annuals. So once you harvest the fruits at the end of the growing season, the plants will die off. If you’d like to grow more watermelons next season, save the seeds from the melons, rinse them off in cold water, and spread them out on a cookie sheet to air dry. Store the seeds in a cool, dry place and turn them regularly. After the seeds have dried for 6 to 10 weeks, store them in a paper envelope until you’re ready to start another round of seedlings.

What’s the best way to grow healthy watermelons?
Watermelons aren’t particularly hard to grow. But growing good watermelons can prove to be a challenge. The best way to produce a delicious crop of watermelons is by meeting all of the plant’s growing requirements from the very start.
For best results, plant your watermelon seedlings in sandy loam soil that’s rich in decaying organic materials. This will provide the young plants with the nutrients they need to grow quickly. Water the plants regularly to keep the soil uniformly damp. Watermelons don’t like to sit in muddy soil, but they’ll grow best if the ground can be kept moist. Check the soil often by sticking your finger an inch into the ground. If it feels dry, water the plants deeply with a garden hose.
Make sure your watermelons are planted in a spot where they can receive 6 or more hours of sunlight every day. Watermelons grow best in warm weather, so making sure they get plenty of light will help them produce. If you live in a particularly hot climate, plant your watermelons in a spot where they get morning sun, but receive some dappled shade in the afternoons.
Fertilizing your watermelon plants can make a huge difference in the quality of the melons themselves. Use a general-purpose plant food until the plants begin fruiting. At this point, you should switch to a low-nitrogen fertilizer. Plants rely on phosphorus and potassium to produce flowers and fruits. Kelp meal works especially well for watermelons during these two growth stages.
More tips for growing sweet watermelons
Meeting all of your watermelon plants’ growing requirements will go a long way toward improving the taste and texture of the melons themselves. However, there are a few other things you can do to grow sweet watermelons. Start by choosing the correct cultivars. ‘Jubilee’, ‘Crimson Sweet’, and ‘Sugar Baby’ varieties are known to consistently produce tantalizingly sweet watermelons.
Most watermelon growers choose to amend their garden soil before planting. Aged manure is nutrient-dense and can help improve soil structure. Adding organic materials to the soil loosens things up and makes it easier for the plants to take root. These materials also provide the plants with extra nutrients as they break down over time.
Growing sweet watermelons is a matter of trial and error. But being able to recognize the watermelon growing stages will help you determine the best way to care for your crop so you have plenty of delicious watermelons to enjoy at harvest time.